 Both L and A have had numerous hair clips in their short lives, bought from a range of places, and we still never seem to have enough. They get lost, hidden in drawers or used on the teddies so that when they are actually wanted for hair we can’t find them. I even made them clip keepers to store them on, yet they still go missing. I’d been thinking about trying to make my own hair clips for a while now, and this is my first effort.
I bought the supplies for making hair clips online from Think Bowtique. They have a huge range of hair accessory making supplies and ribbon, and I found everything I needed there. Most of the ribbons came from Think Bowtique, except the owl and pink flower ones, which I picked up in Big W.


Heat set end.
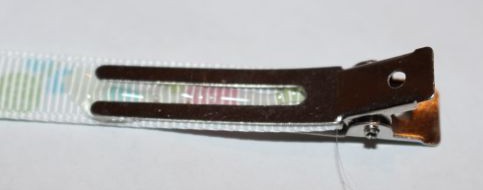
Starting the clip.
I used 9mm grosgrain ribbons, which I cut into lengths of about 12cm, and then heat sealed the ends in a candle flame so that they wouldn’t fray. I used hot glue to secure the ribbon to the alligator clips, first on the underside of the top, starting as close to the hinge as I could. Then I folded the ribbon onto the top of the clip, went around the end, and finished up about mid-way down the underside of the clip. I had to work fast as the hot glue dries quickly, so a few of the ribbons weren’t quite straight. For my first try though, I’m pretty happy with how it went, and I know I will get better with practice.
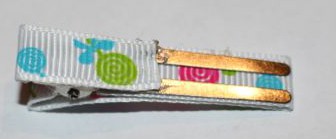
The underside of a finished clip.
I added some little buttons and some half-pearls to a few of the clips to see what they would look like. I was happy with the result, and L and A both really liked them. Next time, I will try some other combinations of decorations added to the basic clips.

Clips with button.
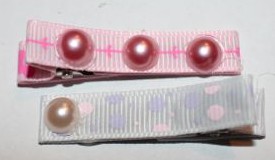
Clips with half pearls.

Clip with non-stick strip.
To help the clips stay in the kids’ hair I added some little non-slip rectangles that I also bought at Think Bowtique. They were very easy to add to the inside of the clip, and really help to keep the clips in place. A has quite fine hair, and one of these clips stayed in her hair all day yesterday, even through a trip to the playground and running around the yard.

A with the first starry clip. in her hair.
A very helpfully watched while I made these clips, and asked many questions, most notably “What are you doing now?”. She picked out which ribbons to use, and the buttons, and she modeled the clips for me.
Now that I see that I am capable of making basic hair clips myself, I think I will do some experimentation with different ribbons and embellishments. I think I will also make some in school colours for the kids to wear to school. There are so many possibilities, and all of them are fun!
