 Terrariums can be lovely mini gardens, perfect for sitting on the table and brightening up the house. Any clear container can be used for a terrarium, but it’s nice to find an unusual shape. We started with a big plastic tub that used to hold mini-pretzels.

Our plastic container.
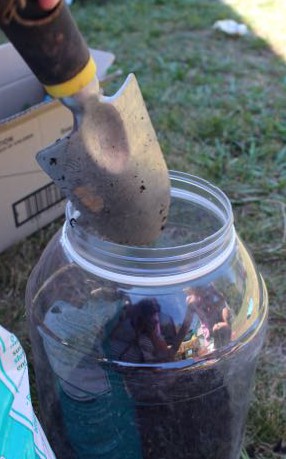
The kids collected some gravel from our front garden beds to place in the bottom of the container for drainage. You can buy decorative pebbles or gravel for this. Using different coloured materials will create a pretty layering effect on the side of the terrarium. We just used what we had available to reduce costs.

Adding gravel.
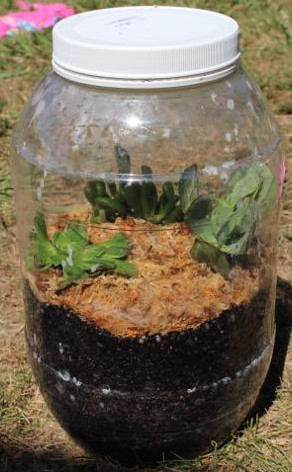
As we wanted to plant succulents into our terrarium we did buy proper cacti and succulent potting mix. We used this to fill the container up to about half-way. Both L and A had a go at putting the potting mix into the container, but quite a lot of it got spilt! Once the dirt was in, we tapped the container down gentled to help the soil settle.
Then it was time to add the plants. We used three small succulents, which the kids chose from Bunnings. I removed some leaves from each of the plants to use for propagating new succulents before I planted them in the terrarium. I carefully placed each succulent roughly equidistant around the container, patting the soil down gently and then watering them in. We added moist sphagnum moss as the top layer, carefully placing it around the plants, but not too close to the stems to avoid rot. This will help to retain moisture. Alternately we could have used small pebbles or rocks to finish off (we already had the moss for our carnivorous plants).
Getting the potting mix in the container.
The succulents we chose are all different shades of green. Choosing plants with different coloured foliage can increase the aesthetics of the terrarium, and of course, there are many plants that do well in terariums aside from succulents. I think our next one will have to contain some ferns.
When the lid to the container is placed on the top, the moisture is trapped inside the terrarium, causing condensation on the plastic. This keeps the terrarium moist without watering very often, though it also obscures the plants. The plants have everything they need within the closed terrarium, but if it is too wet inside, you can remove the lid for a day or two or as long as needed. Or you can leave your terrarium open if you prefer, and treat it more like your average indoor plant.

Looking from above.
UPDATE 19/3/15: L dropped the terrarium! Luckily the container is plastic, so it bounced, but one of the plants catapulted right out the top (I had the lid off allowing the soil to dry a bit), along with a good chunk of the moss. So the poor plant lost all but two of its leaves. We have replanted it in the hopes that succulents are so hardy it will survive, but it looks a little sad at the moment. I have just left the soil bare and the lid off as the weather is beginning to cool a little and is more humid, so it is less likely to dry out too much. L felt so bad about dropping the terrarium, but these things happen! The other two plants are doing very well and we are seeing new growth.


