 Paper lanterns are a quick and easy craft activity, great for rainy days!
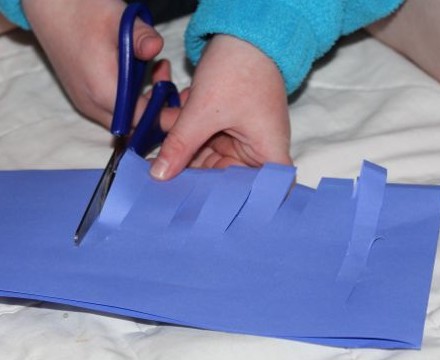
A cutting her paper.
The kids each picked out a sheet of coloured paper and folded it in half lengthways. They cut into the paper from the folded edge, parallel to the short side of the paper, until about 1cm from the non-folded edge. The cuts continued at roughly 1-2cm intervals down the length of the paper. Though A’s cuts were a little wobbly, she was very careful not to cut all the way through.

The cut paper.
Once the cutting was finished, they unfolded their sheets, and with the folded edge facing out, they curled one short edge around to join the opposite edge in a circle. We used sticky tape to secure the two edges together, but staples or glue would have also worked. The kids used some strips of paper in other colours as handles for their lanterns, attaching them with tape to the top.

A’s big lantern.
We had a packet of coloured squares too, which we used to make some mini-lanterns. L thought these little lanterns were very cute, and has hung some of them in her room.
Having the packet of little squares out led A to ask about making a flame for inside her lantern. She picked out some orange and yellow squares, and scrunched them together to form a flame. I helped her tape her flame into the base of her big lantern.

A’s lantern flame.

The flame inside the lantern.
Talk of flames led to talk of campfires, and next thing I know, L has made a fire from red, orange and yellow paper squares, and A has cut up a piece of black paper to form the sticks of a camp fire. A carefully arranged her sticks, and then placed the fire on top of them. She put her little puppy toys next to the campfire and pretended that they were having a little rest next to the warm fire. I love it when the kids have some spontaneous pretend play.

The campfire.

The puppies enjoying the warmth of the campfire.

Nice lanterns. Some ways to make paper lanterns here paperlanternsshop.com/how-to-make-paper-lanterns/