Category Archives: Fine Motor Skills

Soft Play Dough

Standard

Over the holidays we tried a different kind of play dough at home, a very fragrant soft dough using only two ingredients. Now, I’m not sure where I saw or heard of this combination to make play dough originally, but a mum from playgroup had mentioned it recently, only not the quantities required, so we did a bit of trial and error.

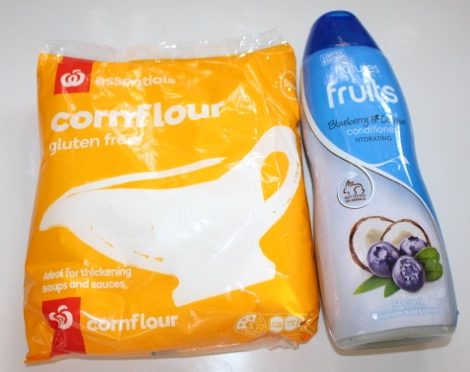
I used blueberry and coconut conditioner that we had in the bathroom (technically it was L’s, but it was the nicest smelling stuff we had at the time…) Oh, and it was a cheap conditioner despite the lovely smell, so it kept the cost of our little experiment down.

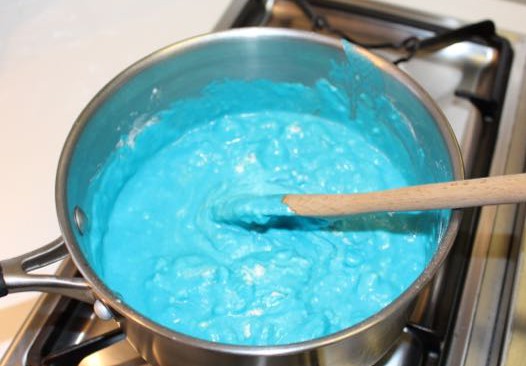
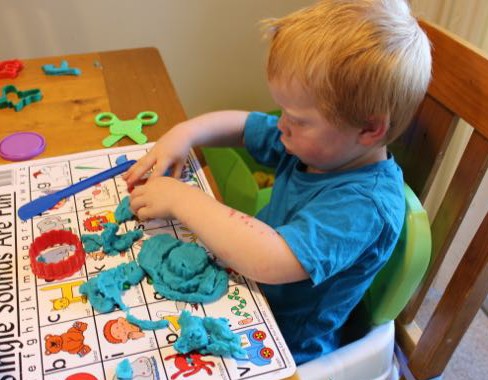
After mixing and adding and mixing some more, I came to the conclusion that the consistency was pretty good somewhere around one part conditioner to two parts cornflour. However, it still seemed a bit closer to slime than to dough, as it just wasn’t all that great at holding its shape. I did try adding more cornflour to the mix, but the boys declared they liked it as it was. I chose not to add any food colouring as the dough became a very pale blue from the colouring in the conditioner.


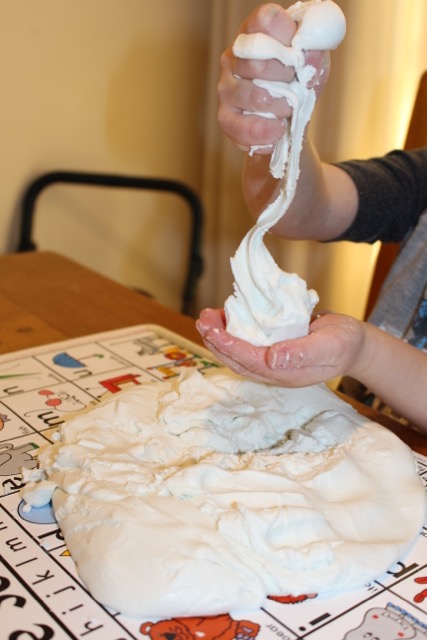
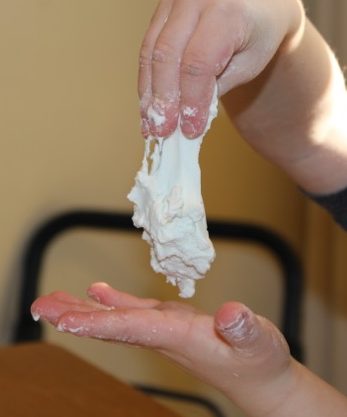
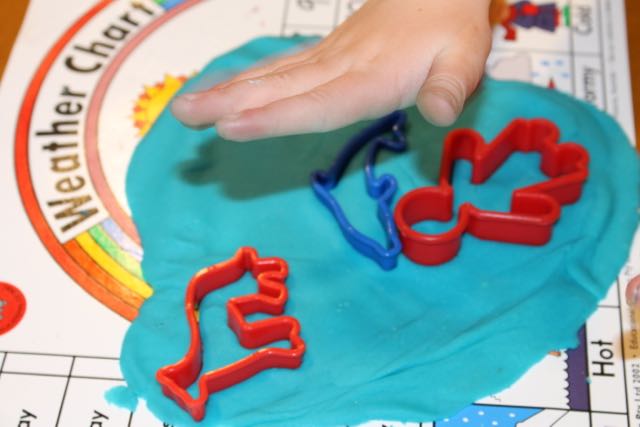
Both boys enjoyed the sensory experience, of the touch and smell of the dough. They squeezed it, and poked it, rolled it in their hands and stretched it. I did have to stop T2 from playing with it after a while though because he kept eating it (despite many warnings and admonishments, and what I can only imagine was a terrible taste!) T1 continued to play with the dough for quite a while, fascinated at the way it felt and moved in his hands.

It kept for a couple of days covered, but it was starting to dry out a little by then. It was fun and easy to make, so we would probably make it again.

Advertisement

Sticker Names

Standard

My preschooler has been learning to write his name. He already recognises his name when it is written, and he knows all of the letters. He can even write the letters quite well, yet putting them together is proving a little challenging!

Adding stickers to his name.

Adding stickers to his name.

To help him practice getting his letters in the right order, we tried this little activity. I drew the letters of his name in bubble writing, and then got him to fill in the letters using stickers (he is sticker crazy!). As he did this, we talked about the letters, and spelt his name aloud several times.

T1 really enjoyed making his sticker name. It’s up on the wall, and he has been going to it and reading the letters out to anyone who is nearby!

This activity could also be used for learning the spelling of any words.

img_8130

Sticker name.


You may also like Sticker Counting and Alphabet Stamping.

A Very Duplo Christmas to You!

Standard

We have a big tub of Duplo that gets played with everyday. On Christmas Eve Big L and A were entertaining the boys with the Duplo, building cars and houses. I challenged them to construct a Christmas tree, and then left them to it. After a while A came and found me to show me what they had built.

One large Christmas tree complete with star on the top, a couple of presents and a Santa, all made from Duplo! Merry Christmas!

IMG_6267

Painting with Cotton Buds

Standard

During a morning at playgroup the boys did some cute little paintings using cotton buds (also called q-tips or cotton tips). Later, we tried it at home.

Painting with a cotton bud.

Painting with a cotton bud.

IMG_5801

Paint on the tray.

I had cotton buds in the bathroom, so we got out enough to have one cotton bud for each paint colour. We put a blob of paint on a plastic take-away container lid, and the boys got started painting.

They had lots of fun spreading the paint with the cotton buds. After a while T1 also used his fingers to add some paint to his page, but mostly they stuck with the cotton buds.

Once they had finished, I threw the used cotton buds out, and washed off the paint trays. This was a cheap, simple and fun activity to do with my toddlers.

T2's painting.

T2’s painting.

T1's painting.

T1’s painting.

Flower Lei

Standard

IMG_5633Summer is coming! Warm weather, sun, sand, surf… The thought of the beach put me in the mood to make flower leis with the kids.

Fabric flowers.

Fabric flowers.

This is a very simple lacing activity using fabric flowers and cut up plastic drinking straws. I bought the flowers from Educational Experience, an online educational supply store. These flowers have little holes in the centre of each one, perfect for threading. You could also make your own fabric flowers from fabric scraps, or use paper/tissue paper for the flowers.

Threading flowers and straws.

Threading flowers and straws.

We cut pieces of yarn roughly a metre long, and tied a big knot in one end to prevent the flowers from slipping off. The kids alternated flowers and straws until they had filled their yarn up. I helped them tie the ends together to form a loop, and the leis were ready to wear.

The younger kids had some trouble keeping the plastic yarn needle on the yarn, so I tied the needle on for them. This allowed them to focus on the threading without the frustration of needing to re-thread the needle all the time. Once they were finished, we just cut the needle off and tied the ends together. The boys (who are only two) did very well with this activity, carefully threading their flowers and straws on. This is a great activity for fine motor skills, hand-eye coordination and concentration. And it makes some lovely, bright leis for dressing up with!


Playdough

Standard
Shapes cut out of the dough.

Shapes cut out of the dough.

My kids all love playing with playdough, it is fun and great for fine motor skills and creativity. The toddlers have even mostly stopped trying to eat it now! I prefer to make my own playdough as it is easy to make and cheaper than the store-bought products. I almost always have all the ingredients in the pantry too, so I can make it whenever we like.

Ingredients.

Ingredients.

I’ve always felt that the playdough recipe on the side of the cream of tartar tin makes the best playdough. It needs to be cooked, but it is smooth, soft and long lasting every time. We added blue food colouring for the colour and vanilla essence to make it smell nice. A helped me to stir it in the saucepan until it began to clump together, then we turned it out onto a cutting board and kneaded it for a couple of minutes to make sure it was nice and smooth.

Mixing all the ingredients in a saucepan.

Mixing all the ingredients in a saucepan.

Fresh blob of dough.

Fresh blob of dough.

Once the playdough was ready, the lids sat up at the table to use it. They moulded it with their hands, cut out shapes with cookie cutters, and rolled it into balls and snakes. T2 enjoyed just squishing it between his fingers, while L made people models. A and T1 made lots and lots of cut-outs. They also used some plastic scissors to cut the dough, rollings pins to flatten it, and plastic rollers to make patterns on the dough. Fun was had by all!

Making cut-outs.

Making cut-outs.

Squishing the dough.

Squishing the dough.

Using a roller in the dough.

Using a roller in the dough.


Once we were finished, I stored the playdough in an airtight container in the pantry for next time.

IMG_5419

Green Sensory Tub

Standard

IMG_4797

After gathering some green items together, we sat down to our green sensory tub. We had some ribbons, pipe cleaners, bowls, spoons, a toy train and a toy truck, muffin case, wooden and plastic trees and some green toy bugs and snakes. The boys were both very interested in the toy train and toy truck, rolling them all over the tub and the floor. They touched the fuzzy pipe cleaner, and used the spoons to scoop up the bugs. T1 tried to wear one of the bowls as a hat. T2 crinkled the muffin case, and fluttered the ribbon about his head.

Scooping from the bowl.

Scooping from the bowl.

T2 had a lot of fun moving the snakes and bugs about, and using the spoons. He pretended to scoop food out of the bowls and eat it off the spoon. After a bit, T1 tossed all of our green items out of the tub and sat in the tub himself! We talked about the colour of his clothes, but he wasn’t wearing anything green! He liked repeating the word “green” after me, and finding things about the house that were also green.

Making the snake ride the truck.

Making the snake ride the truck.


Red Sensory Tub

Standard

IMG_4777

On a cold winter’s afternoon we pulled out our tub and filled it with red objects to create a sensory tub for the boys. We had some straws, toy trains and a firetruck, tongs, a funnel and cup, pom poms and mittens.

Going straight for the train!

Going straight for the train!

We explored the different textures of items within the tub. T1 kept putting the pom poms in his mouth, so I removed them before them could be swallowed! He also enjoyed touching the pipe cleaners and blowing through the straws. T2 liked the mittens, and rubbed them all over his face. He also tried putting them on his hands, and his feet.

Trying to pick up the train with the tongs.

Trying to pick up the train with the tongs.

They both loved playing with the trains and the firetruck. T2 tried to use the tongs to pick some of the other objects up, but without much success.

Making music.

Making music.

T1 used the funnel to make music by blowing through it like a horn. He also threaded one of the pipe cleaners through the funnel a number of times.

Throughout the fun, we talked about the colour red, and I encouraged them to say it. I pointed out other things around the room that were red, and asked them if they knew anything else that was red. They both became very excited when I started talking about red fruits, such as strawberries, apples and raspberries. We had to go for a snack after that!

Threading.

Threading.


Felt Pictures

Standard

IMG_4533

Felt shapes.

Felt shapes.

I found a felt board among the puzzles, but couldn’t locate the bag of felt pieces that went with it, so we made our own. I used several different colours of felt, and cut them into basic shapes, such as squares, circles and triangles. A took the felt board to make her pictures, while L used a plain piece of black felt as her background. Felt sticks to felt, so the shapes will stick to any piece of felt, L just laid her piece of the floor so that it was flat.

A adding grass to her house picture.

A adding grass to her house picture.

Adding a sunset.

Adding a sunset.

A made some pictures of houses and a city, with blue sky and green grass, and of course a wonderful yellow sun. L used her black background to create a lovely night picture and a volcano picture. She cut up some more felt to suit her design, as she wanted little pieces of white to create the ash for her volcano.

We had a lot of fun making our felt piece pictures, and it was simple and fairly cheap to set up. We have stored the felt pieces in a zip-lock bag to use next time we feel like making felt pictures.

L's volcano.

L’s volcano.

Secret Messages

Standard

Crayons, wax and oil pastels are great at repelling water coulour paint. This property makes them a good choice for writing secret messages. White is the best colour to use on white paper as it is hard to see the writing before adding the paint! Unfortunately A chose to use a white oil pastel and our paper was more of a beige colour (blank newspaper print), so the messages weren’t quite as secret as they might have been 🙂

My message for L and A.

My message for L and A.

A wrote out all of the sight words that she is currently working on in white oil pastel. L drew a picture and wrote messages. Then the kids used their water colour paints to bring the messages to life.

Writing her sight words.

Writing her sight words.

Painting on the water colours.

Painting on the water colours.

We had fun writing messages to eachother, which were then ‘discovered’ by adding paint. This is also a great activity for practicing spelling words as well as sight words.

A word 'discovered'.

A word ‘discovered’.

Words appearing through the paint.

Words appearing through the paint.