Tag Archives: flowers

Flower Lei

Standard

IMG_5633
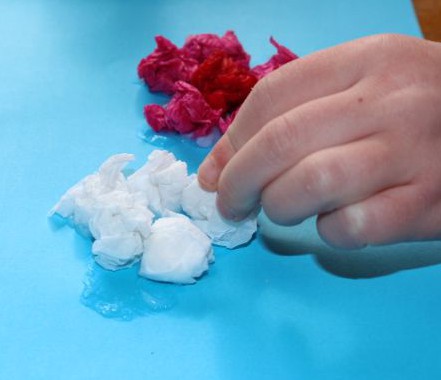
Summer is coming! Warm weather, sun, sand, surf… The thought of the beach put me in the mood to make flower leis with the kids.
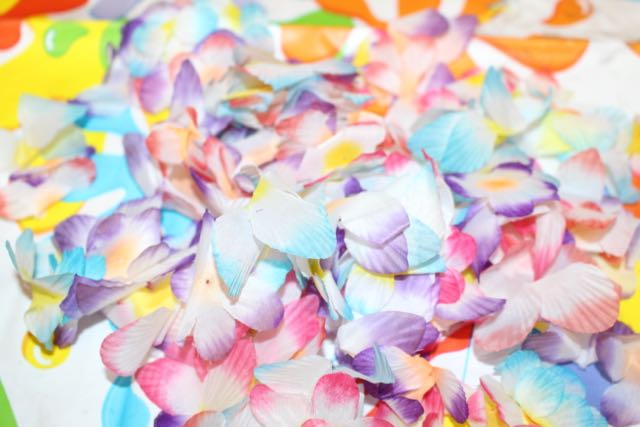
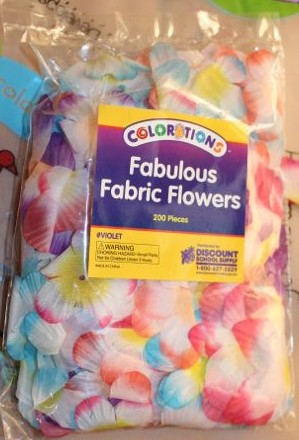
Fabric flowers.

Fabric flowers.

This is a very simple lacing activity using fabric flowers and cut up plastic drinking straws. I bought the flowers from Educational Experience, an online educational supply store. These flowers have little holes in the centre of each one, perfect for threading. You could also make your own fabric flowers from fabric scraps, or use paper/tissue paper for the flowers.

Threading flowers and straws.

Threading flowers and straws.

We cut pieces of yarn roughly a metre long, and tied a big knot in one end to prevent the flowers from slipping off. The kids alternated flowers and straws until they had filled their yarn up. I helped them tie the ends together to form a loop, and the leis were ready to wear.

The younger kids had some trouble keeping the plastic yarn needle on the yarn, so I tied the needle on for them. This allowed them to focus on the threading without the frustration of needing to re-thread the needle all the time. Once they were finished, we just cut the needle off and tied the ends together. The boys (who are only two) did very well with this activity, carefully threading their flowers and straws on. This is a great activity for fine motor skills, hand-eye coordination and concentration. And it makes some lovely, bright leis for dressing up with!


Advertisement

Tissue Paper Flower Art

Standard

IMG_1682

Sheets of tissue paper.

Sheets of tissue paper.

Spring has sprung, and A is feeling like doing lots of flowery arts and crafts at the moment. She made this delightful picture by scrunching up circular sheets of tissue paper into small balls and gluing them onto a sheet of blue paper.

Gluing down the tissue paper balls.

Gluing down the tissue paper balls.

Every time she scrunched up a piece of tissue paper, she said “Scrunching it up like I don’t want it any more.” And then she would stick it down using Clag glue. She even put a sun up in the corner to help the flowers grow. The stems, leaves and grass, she drew using green markers.

Adding grass.

Adding grass.

Button Flower Art

Standard

IMG_0260

Placing buttons.

Placing buttons.

These old buttons have been made into flowers by A. She chose a centre for each flower, and then surrounded it with other buttons for the petals. Once the buttons were placed just right, I helped her to glue them down.

Drawing flower stems.

Drawing flower stems.

A used crayons to draw flower stems and leaves and grass. She wanted lots and lots of wild grass, and ended up drawing so much the flower stems were lost a bit, but she was happy. The top of the page looked a bit bare then, so I suggested some clouds. A decided that if there were to be clouds there should also be rain, and a sun. She told me that it needed a sun to be happy, but she also wanted it to be a rainy picture.

Button flowers stuck down.

Button flowers stuck down.

Flower Bouquet

Standard
IMG_9918

L’s bouquet.

Fabric flowers.

Fabric flowers.

I bought these fabric flowers on a bit of a whim, with no idea what we might use them for, I just liked the look of them. Seeing all the flower bouquets in the lead up to Mother’s Day made me think of our fabric flowers, and how we could use them to make our own bouquets.

Two flower shapes on one stem.

Two flower shapes on one stem.

Each of the flower shapes have a little hole in the centre of them, just perfect for threading onto pipe cleaners. We cut some green pipe cleaners in half, and used these as the flower stems. There were three sizes of flowers in the pack, and the kids used these layered from largest to smallest on their stems. Some of their flowers had only one flower shape, while others had three layered on each stem. We twisted the end of the pipe cleaner over on itself at the centre of the flowers to prevent the flowers from coming off their stems.

Placing the flower shapes onto a stem.

Placing the flower shapes onto a stem.

Once they had finished making their flowers, they bundled them together, re-arranging them into a bouquet with all the flowers facing out or up. We bent some of the pipe cleaner stems to help shape the bouquets. Once they were happy with their bouquets, we tied them up with ribbons.

A's bouquet.

A’s bouquet.

L and A combined their flowers into a vase for the dining room table, where they look very pretty.


Flower Picture

Standard

A few weeks back at playgroup the craft activity was making a banner of flowers. The stems and leaves were drawn on in crayon, and the flowers were patty pan and muffin cases. Today A made a smaller version of this flower picture at home, with the addition of some muffin case leaves.

Adding glue.

Adding glue.

Placing the muffin cases.

Placing the muffin cases.

A drew some stems on where she wanted her flowers to be, and then she began adding the muffin cases. We had a mix of red, blue, yellow and green cases. Some of the cases were glued to the stems whole to represent open flowers, while others were folded in quarters as budding flowers.

The open flowers received a pom pom centre and the green cases were folded into eighths to make leaves. A glued these onto some of the stems. She also added some crayon grass to the bottom of the picture to complete the scene.

Finished flowers.

Finished flowers.

Flowers and Vase

Standard

Sometimes we pick flowers from the garden and bring them in to brighten up the dining room, but I always feel a little sad when they wilt and die. So we decided to make some flowers that wouldn’t die, along with a brightly coloured vase to put them in.

We used a tall, narrow cardboard box for the vase, as I just happened to have a very thick and sturdy box that was perfect for it. A clean tin would have worked equally as well. We started by ripping up some coloured paper into smallish pieces. Our paper was starry and we had the same starry print in four different colours, but any mix of colours or patterns could work. We used glue to paste the ripped up paper pieces on to the outside of the box, so that the surface was completely covered by overlapping the pieces in random order. We did this on each side of the box. L particularly liked ripping up the paper, and A was thrilled to use the glue.

Gluing paper pieces to the box.

Gluing paper pieces to the box.

Half-way through covering the box in paper, letting it dry.

Half-way through covering the box in paper, letting it dry.

I gave the kids two disposable plastic cups each and a pack of coloured permanent markers to make our flowers. I asked them to colour the cups in with whatever design they would like. Once they had finished their colouring, I cut the tops of the cups into strips, and bent them out to form the petals on our flowers. The edges of the cuts can be a bit sharp, so we had to be careful when handling the cups once I’d cut them. A coloured each of her petals in using all of the different coloured markers. Even though I put down newspaper to protect the paper, somehow L still managed to get blue permanent marker on the table… Big L poked a hole in the base of each cup, and I placed a green pipe cleaner through this hole, bending it down to form the flower stem, and then secured it with some tape on the base of the cup. This gave us four lovely flowers.

A colouring in her cups.

A colouring in her cups.

The cup cut to form petals.

The cup cut to form petals.

Finished vase with some of our flowers.

Finished vase with some of our flowers.

Our finished vase will live on our dining room table, and the kids are already planning to make some more flowers so we can change them over every now and again.