Tag Archives: messy play

Sand Art Spelling

Standard

Painting on the glue

I’ve been trying to get T1 excited about spelling, but he’d much rather be off playing video games or jumping on the trampoline.


We have actually done a lot of spelling on the trampoline; he says one letter of the word for every jump he does. And we have done lots using other activities, but when I found some tubs of coloured sand, I knew we needed to try making some sand art!


Sprinkling on sand


We used everyday white glue to paint each word onto a page of paper. T1 chose to do all of his words in red sand. After painting all of the letters in each word, he carefully sprinkled the sand onto the glue. Once there was enough sand to cover all of the glue, T1 tipped the excess sand off into the baking tray we were using underneath the paper (useful for reducing mess)


Shaking off excess sand

Each word or even letter could be done in different colours if desired. I think it would look good on black paper too. T1 is keen to make his next spelling list into sand art as well!


Sand art spelling words

Advertisement

Soft Play Dough

Standard

Over the holidays we tried a different kind of play dough at home, a very fragrant soft dough using only two ingredients. Now, I’m not sure where I saw or heard of this combination to make play dough originally, but a mum from playgroup had mentioned it recently, only not the quantities required, so we did a bit of trial and error.

I used blueberry and coconut conditioner that we had in the bathroom (technically it was L’s, but it was the nicest smelling stuff we had at the time…) Oh, and it was a cheap conditioner despite the lovely smell, so it kept the cost of our little experiment down.

After mixing and adding and mixing some more, I came to the conclusion that the consistency was pretty good somewhere around one part conditioner to two parts cornflour. However, it still seemed a bit closer to slime than to dough, as it just wasn’t all that great at holding its shape. I did try adding more cornflour to the mix, but the boys declared they liked it as it was. I chose not to add any food colouring as the dough became a very pale blue from the colouring in the conditioner.


Both boys enjoyed the sensory experience, of the touch and smell of the dough. They squeezed it, and poked it, rolled it in their hands and stretched it. I did have to stop T2 from playing with it after a while though because he kept eating it (despite many warnings and admonishments, and what I can only imagine was a terrible taste!) T1 continued to play with the dough for quite a while, fascinated at the way it felt and moved in his hands.

It kept for a couple of days covered, but it was starting to dry out a little by then. It was fun and easy to make, so we would probably make it again.

Suzie’s Messy Room by Diane N. Quintana and Jonda S. Beattie

Standard

Cover Suzie's Messy RoomSuzie’s Messy Room by Diane N. Quintana and Jonda S. Beattie, picture e-book, 48 pages, published by Page Publishing in 2015.

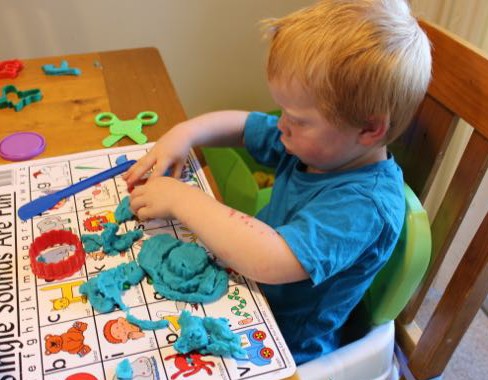
Suzie is five, and she loves playing in her room. Sometimes she has so much fun her room gets really messy with toys, books and puzzles everywhere. Now it’s time to clean up the mess, buts it’s a big job for a little girl.

The authors have applied their organisational skills to the task of cleaning up a child’s bedroom in Suzie’s Messy Room. Suzie’s mum breaks the job into smaller, more manageable tasks, such as focussing on picking up the clothes, or putting away the dolls. This helps Suzie to complete the job. Alongside colourful illustrations depicting Suzie cleaning up her room, the story helps to show kids how they can go about organising their rooms and keeping them neat and tidy.

I know Suzie’s mess very well! And I know how hard it can be to know where to start when the job is so humongous. The techniques used in Suzie’s Messy Room are useful for children to utilise. It really can make the job of cleaning up a room much easier, though I’m still not convinced anything can make them like it! Preferably this book would be shared between parents and their children, leading to a discussion about the state of the child’s bedroom and what needs to happen to make it tidy again! Hopefully this book will help convince kids to clean up.

I understand the need to reinforce positive behaviour, but I think going out for a special ice-cream is a little over the top for cleaning up her room. I prefer verbal praise and high-fives and stickers, and I keep a “rewards box” with small items in it for jobs really well done.

The illustrations are nice and bright. They remind me of some of the picture books I had as a child, though that might just be Suzie’s short, curly hair! And the mother’s ears made me think of elves, mostly on the page where she is hugging Suzie. I really like Suzie’s facial expressions.

Overall, a nice book about cleaning up, with some positive ideas for helping children do it themselves. It is suitable for primary school students, but I suggest reading it with your child to get the most benefits.


*I received this book from the author as digital copy, who asked me for an honest review of this book. I did not receive any other remuneration, and the review is composed entirely of my own opinions.

Pool o’ Slime

Standard

We love playing with slime, it’s just so much fun. Normally we just make up a tubful, using about half a kilo of cornflour plus water and food colouring. This time we used our blow-up drinks cooler (which looks like a small paddle pool), and we added about seven kilos of cornflour, plus water. If I’d had any more cornflour I would have used it!

Happy in the slime.

Happy in the slime.

This was definitely an outside activity. All the kids put on their swimmers (and sunscreen), and then we got to it. L and A helped me put all of the cornflour into the drinks cooler, and then I added some water and the kids mixed it all up.

A got splattered with slime by her brothers.

A got splattered with slime by her brothers.

Predictably, the kids all got into the drinks cooler and sat, jumped and squished through the slime. At one point all four of them were in the cooler at the same time! They covered themselves and each other in slime, they mashed it between their fingers, and they “swam” in it. They love that the slime is both a liquid and a solid, pulling globs of it up into the air and then letting it drop and stream back down through their fingers. It was so thick in its solid state that the boys could actually stand on it and it supported them!

This was a great way to spend a hot afternoon. We all had a lot of fun. At the end, everyone was hosed off in the yard, and then went inside to bathe. The slime comes off the skin quite easily in the water, but they all needed to wash it thoroughly out of their hair!

Squishing slime through her toes.

Squishing slime through her toes.

L letting slime drip from her fingers onto her brother.

L letting slime drip from her fingers onto her brother.

Playdough

Standard
Shapes cut out of the dough.

Shapes cut out of the dough.

My kids all love playing with playdough, it is fun and great for fine motor skills and creativity. The toddlers have even mostly stopped trying to eat it now! I prefer to make my own playdough as it is easy to make and cheaper than the store-bought products. I almost always have all the ingredients in the pantry too, so I can make it whenever we like.

Ingredients.

Ingredients.

I’ve always felt that the playdough recipe on the side of the cream of tartar tin makes the best playdough. It needs to be cooked, but it is smooth, soft and long lasting every time. We added blue food colouring for the colour and vanilla essence to make it smell nice. A helped me to stir it in the saucepan until it began to clump together, then we turned it out onto a cutting board and kneaded it for a couple of minutes to make sure it was nice and smooth.

Mixing all the ingredients in a saucepan.

Mixing all the ingredients in a saucepan.

Fresh blob of dough.

Fresh blob of dough.

Once the playdough was ready, the lids sat up at the table to use it. They moulded it with their hands, cut out shapes with cookie cutters, and rolled it into balls and snakes. T2 enjoyed just squishing it between his fingers, while L made people models. A and T1 made lots and lots of cut-outs. They also used some plastic scissors to cut the dough, rollings pins to flatten it, and plastic rollers to make patterns on the dough. Fun was had by all!

Making cut-outs.

Making cut-outs.

Squishing the dough.

Squishing the dough.

Using a roller in the dough.

Using a roller in the dough.


Once we were finished, I stored the playdough in an airtight container in the pantry for next time.

IMG_5419

Sight Words Finger Painting

Standard

IMG_3893Finger painting last week was so much fun, A asked if we could practice her sight words with finger paint. This time we used ordinary poster paint (Baby T was sleeping), and we squirted some into one of our play tubs. The tub was yellow, so we used green paint as it gave us a good contrast.

Squirts of paint.

Squirts of paint.

Smoothing the paint around the tray.

Smoothing the paint around the tray.

A had a great time spreading the paint around the bottom of the tray, squishing and sliding in it. When she was ready, she smoothed the paint across the bottom of the tray, and then proceeded to use the tip of her index finger to write her words. When she had filled the tray with words, she smoothed the paint over, and wrote some more words.

Writing a word.

Writing a word.

Writing more words.

Writing more words.

Finger Painting

Standard

IMG_3905

Finger painting palette.

Finger painting palette.

In order to make finger painting available for Baby T, I tried making some home-made edible paint. It probably wouldn’t taste very nice, but I just wanted something that wouldn’t hurt him if he put it in his mouth! So I mixed up a runny mixture of cornflour, water and food colouring, making it thick enough to feel like paint but thin enough to spread. It’s just a runny version of the slime we like to have sensory and messy play with.

Dipping her fingers.

Dipping her fingers.

Drizzling paint onto paper.

Drizzling paint onto paper.

Finger painting.

Finger painting.

The kids had a good time spreading the paint around in the tubs, drizzling it to make patterns, and swirling it together. They squished their fingers through it, and then made some paper prints from it. The paper soaked up the coloured water from the cornflour, leaving pretty patterns on the paper. They also used it to paint directly onto paper.

Paint in the tub ready to use for prints.

Paint in the tub ready to use for prints.

Once they were finished, it all washes off with soap and water. This was an inexpensive, easy and fun activity for a lazy Saturday afternoon.

A print.

A print.

L's finger painting of a red sunset.

L’s finger painting of a red sunset.

Slime

Standard
Packets of cornflour.

Packets of cornflour.

This is the easiest way to make slime, and requires only cornflour and water. I usually add some food colouring to the mix too, for a bit of extra fun. Green is our favourite slime colour. I once made it red, and it stained everything it touched, including our skin, so no more red slime for us!

I used a kilogram of cornflour in each tub, and roughly the equivalent in water. I normally just add water while mixing until I get to a consistency that I like. Less water makes it firmer, more water makes it runnier. I tend to lean towards firmer to start, as inevitably, the kids want to add water to the mix at some point while playing with it. The food colouring can be added to the water as you mix it in, or to the already mixed slime (it’s easier to do it while mixing in the water).

The first touch.

The first touch.

Getting our hands slimy.

Getting our hands slimy.

Past experience told me to get the kids into swimmers and take this activity outside. It is very messy. Afterwards I can hose the kids down, hose out the tubs and hose the mess from the grass too. Luckily it was really hot so we enjoyed playing with the hose once we were finished with the slime.

Letting her hands sink into the slime.

Letting her hands sink into the slime.

Oozing slime.

Oozing slime.


Previously we have used various plastic animals, cups, scoops, spoons, tongs and funnels with the slime, but the kids have just as much fun without any extra play items. It is a fascinating substance that keeps the kids entertained for ages. It is lots of fun to scoop up in our hands, squish it between our fingers, and let it ooze back into the tub. We talked about its liquid and solid properties and looked at ways of changing the pressure on the slime to cause it to solidify or to liquify. The kids tried pressing it quickly or letting their hands slide into it. And of course, eventually one of them stood in it, and then sat in it. Baby T was particularly pleased with the way it squelched up between his toes.

Baby T dropping slime on L's head.

Baby T dropping slime on L’s head.

Ice Tub

Standard
Ice in a tub.

Ice in a tub.

It was very hot today, and baby T was feeling it. He was getting around in just his nappy, but he still felt warm. We had just turned on the air conditioning inside, so I placed some plastic mats on the floor in the lounge room and placed a sensory tub on the mats with some ice cubes in it.

Baby T was carrying around one of the bath squirters and a Little People cow, so he tossed those straight into the ice, and then sat down and started picking it up. He liked how cool it was.

Eating ice.

Eating ice.

Playing with the ice.

Playing with the ice.

He ate quite a few pieces of ice, so I am glad that I used only the clean ice that we use in drinks! He also rubbed the ice cubes over his face, legs and body. He moved them around, and played with the water as the ice began to melt. Inevitably, he upended the tub of ice and water over his head and shrieked with laughter.

Rubbing ice on his chin.

Rubbing ice on his chin.

This was a cheap and easy activity to help him cool down and have fun. He spent a little while playing with this tub on his own before his sisters came to join him. He became very possessive of the melting ice and screamed at L and A when they took bits of ice to eat!

There wasn’t much of a clean up as the kids ate most of the solid pieces of ice, and the water on the mats was easily soaked up with a towel and the mats put outside to dry.

Shaving Cream Play

Standard
Shaving cream in a tray.

Shaving cream in a tray.

A very easy activity for kids is letting them play with shaving foam. It’s easy to clean up with water and is lots of fun. It’s not good to eat though, so I prefer not to let Baby T near it, but L and A love squishing their hands into it.

Squishing and squashing.

Squishing and squashing.

Whisking.

Whisking.

We used a couple of plastic trays on top of a muck mat, in an attempt to contain the shaving foam. It’s nice to do this outside if the weather permits, where we can just hose the area down. L and A each had a tray with shaving cream in it. They used various utensils to mix and scoop it, but mostly they just liked to feel it, squish it and squeeze in through their fingers.

Mixing and spreading.

Mixing and spreading.

L pretended the shaving cream was part of her cafe and she made me a smoothie. A whipped her shaving cream up with a whisk, and somehow managed to get shaving cream all the way up her arms and on her face.

We have previously used shaving cream to practice writing spelling words in too. We just smooth a layer of shaving cream in the bottom of a tray, and then write the words using a finger to form the letters.

Messy fun!

Messy fun!