Tag Archives: craft gift

Plaster Hand-Prints

Standard

I like the idea of having little mementos of our children’s childhoods. They each have a box of things that we can show them when they are older, such as the hospital tags from when they were born, favourite baby toys, newborn clothing, and as they get older, certificates, special drawings and some school things. Having hand and foot prints of our children have been a nice addition to their boxes, as we can look back at how small they were.  I wanted something that we could display (aside from photographs), and making hand prints in plaster was the perfect solution. IMG_7806

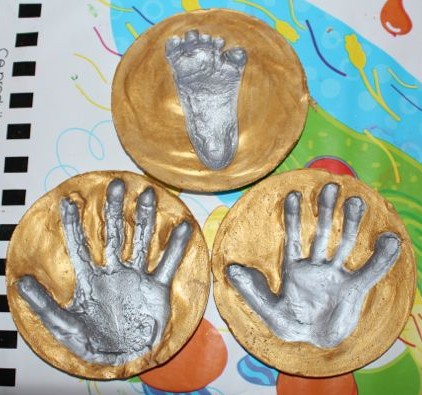
I bought a box of plaster-of-paris, and mixed it according to the directions on the pack. We used some small plastic plates as our moulds, into which I poured the plaster mixture to fill the plate about three-quarters full.

Box of plaster-of-paris.

Plaster-of-paris.

Plate of wet plaster.

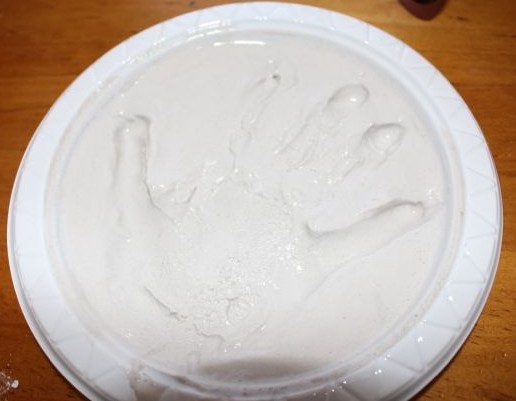
I’d made it a little runnier than necessary, so we waited for it to thicken a little before each of the kids placed their hand, palm down, into one of the plates. I used Baby T’s foot instead of his hand, as I thought he would probably just scrunch his fingers up in the plaster, and we wouldn’t get much of an impression. L and A held their hands in the plaster for about a minute before carefully lifting them out, leaving behind their hand print. I held Baby T’s foot in the plaster while he sat in the high chair, he was not overly impressed by this. It was very easy to wash the plaster off their skin once the impressions were made.

Impression in the wet plaster.

Impression in the wet plaster.

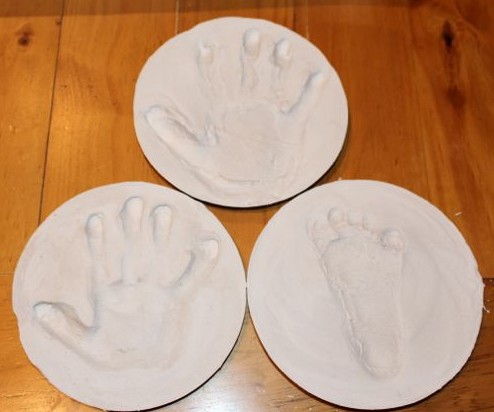
We left the plaster to dry for several hours before checking them. They seemed fairly dry, but I left them overnight to dry completely before removing them from the plates. They slipped out of the plates very easily.

Impressions in the dried plaster.

Impressions in the dried plaster.


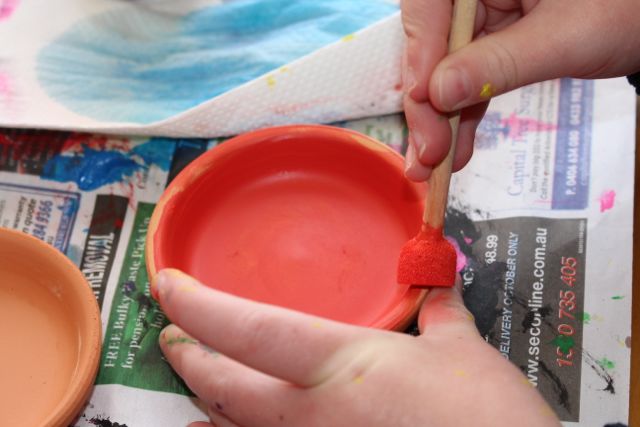
Once dry, I painted each impression with silver acrylic paint, and then the surrounds with gold acrylic paint. I did a couple of coats to make the metallic colour brighter. I left them to dry overnight, and then I added their name and the date in black acrylic to each one. I’m still deciding whether to add some spray gloss to them. I think it might be a good idea to help protect them, but I have to go and find where the gloss was stashed after our last project to use it.
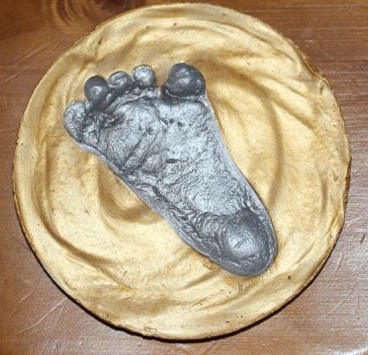
Painted foot print.

Painted foot print.

Advertisement

Terracotta Pots

Standard
L's finished pots.

L’s finished pots.

The pot decoration kits we bought from Bunnings.

The pot decoration kits we bought from Bunnings.

I went to Bunnings looking for some terracotta pots for the kids to paint and decorate. There were lots of pots in all different sizes and shapes. And then we came across some kids craft packs to decorate three terracotta pots, including paint and rhinestones. That seemed like a very easy option, so we bought two kits.

The pots were only little, but perfect for L and A to decorate. We turned A’s pots upside down to make it easier for her to paint. She also painted the bottom of each pot. There was only one small brush with each kit, so we got out enough brushes to have one for each colour. That way we didn’t have to keep washing the brush all the time (it also meant we didn’t need a cup of water on the table that A could somehow manage to knock over…) A did some lovely painting on the outside of each pot, covering the entire surface. She used some sponge brushes to paint the little saucers for each pot, making smiley faces on them. L chose not to cover the whole of the pots in paint, instead she painted pictures, swirls and letters.

A painting her first pot.

A painting her first pot.

Painting the saucer.

Painting the saucer.


L painting a Christmas tree on one of her pots.

L painting a Christmas tree on one of her pots.

Once the paint was completely dry (which didn’t take very long at all), the kids got to add the rhinestones. Oh, how they love to decorate with rhinestones! We used PVA glue to attach the rhinestones. There was a mix of shapes, sizes and colours, and they used a variety on each pot.

Adding rhinestones.

Adding rhinestones.

More rhinestones.

More rhinestones.


Each kit came with some foam flower press outs to make up too. These could be used as a decoration in the pots if desired, but the kids wanted to put real plants into their pots, so the fake flowers were put aside to complete later to add to the vase they made a few weeks ago.

L and A want to give their finished pots (with little plant) to their teachers for Christmas this year, as an alternative to the traditional coffee cup or box of chocolates. The kids had a great time decorating them, and we hope their teachers will like them!

A's finished pots.

A’s finished pots.