Pop-sticks are so versatile, and they can be used to make simple and fun Christmas decorations. We made stars and trees using the regular sized pop-sticks, and some small stars with mini pop-sticks.


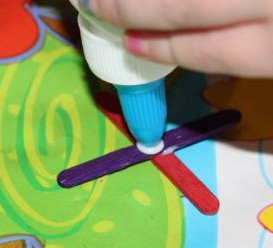
Gluing the pop-sticks together.

Triangles ready to be glued together.
For the larger stars, we made two triangles with the pop-sticks by gluing the ends together. Then we placed one of the triangles on top of the other one, so that one triangle was point up, and the other one was point down. We glued the triangles together like this, and got our star. To finish them off we added glitter glue and once they were dry, I tied a loop of string to one of the points so it could be hung on the tree.


Christmas trees.

Adding glitter glue.
The Christmas trees were made with a triangle of green pop-sticks, and a natural coloured pop-stick glued behind the triangle to form the trunk. We had coloured pop-sticks, but natural pop-sticks could be easily painted green before construction. Glitter glue finished off the trees. Later, a loop of string was added so the tree could be hung up.

Gluing mini pop-sticks together.
The little stars were made by stacking the mini pop-sticks at different angles to produce eight points. A small dab of glue was all that was necessary to keep the pop-sticks together. Once dry, we tied some string around the stars to hang them from.
These decorations all look great hanging on our Christmas tree!