Tag Archives: gift idea

Gum Leaf Bookmarks

Standard

Every house seems to have a sock-eating monster, but I think our resident sock-eating monster has a mate that only likes to eat bookmarks! It’s the only possible explanation 🙂 We like making bookmarks, and we even have a special holder for them, yet every time I want a bookmark, they all seem to be MIA. So here we go, making more bookmarks!

A and I collected some large, dry gum leaves from under some of the the big gums nearby. We looked for reasonably flat and undamaged leaves. A found a very pretty pinkish leaf that she liked.

IMG_6152
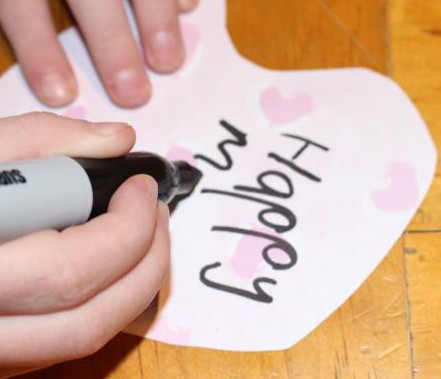
We used permanent metallic markers to write messages on the leaves. The girls worte “Merry Christmas” on many of the leaves, and then signed their names, so that these bookmarks could be given to their teachers as part of their end of year presents.

We had to wait for the metallic ink to dry completely before laminating the leaves. I managed to get about three leaves to each laminating pouch. After the laminating was done I carefully cut around the leaves, making sure to leave a border of sealed laminate around each one.

These unique bookmarks were quick and simple. They were well received by the teachers too.

IMG_6154

Advertisement

Hand-print Bookmarks

Standard

IMG_4472For Mother’s Day this year we made bookmarks using the hand-prints of the kids. I found some old scrapbooking papers that had pink or blue heart patterns on them to use as our base for the hand-prints.

Using the paint pad.

Using the paint pad.

A's hand-prints.

A’s hand-prints.

Each child chose the background paper to use, and the colour of paint for their hand-print. Predictably A chose pink on pink for her bookmarks. L used the rainbow paint pad for her hand-prints on the back on the blue paper.  Unfortunately the rainbow paint didn’t come out as clearly as the other paint, but L liked it as it was. The boys used blue paint on blue paper. Using paint pads for hand-prints makes it easy to get a good amount of paint on the hand, and is much less messy than using conventional paint.

Hand-prints.

Hand-prints.

After the hand-prints were dry, I carefully cut around each hand. The kids wrote some lovely messages on the back of one of their hands using a marker. A pushed down her marker quite hard, and the ink is visible through the hand-print. She also drew a lot of love hearts! I love it because it is so unique.

Writing a message on the back of the hand-print.

Writing a message on the back of the hand-print.

To finish the bookmarks I laminated the hand-prints. I arranged the hand-prints so that A’s hands and Baby T’s hands were together to make a bigger bookmark each, while L’s hand-print was big enough as one. I also did a single print of my hand to make a bookmark for my mum. Once laminated, I carefully cut around the hand-prints so that there was a small amount of plastic laminate around each one. The kids were happy with their bookmarks.

One of the boy's bookmarks.

One of the boy’s bookmarks.

A hand-print bookmark in my latest read.

A hand-print bookmark in my latest read.