Tag Archives: bookmark

The Special Book Box

Standard

I received two book boxes in May from The YA Chronicles; there was the regular monthly instalment, and the special pre-order box for A Court of Wings and Ruin (ACOWAR) by Sarah J Maas.

I get excited every time a book box is due, but waiting for the ACOWAR box was torture! I greatly enjoyed  the first book in this series, A Court of Thorns and Roses, and it was definitely love through the second book, A Court of Mist and Fury, so I was extremely ready to dive into the third book once it arrived. (Read my review of A Court of Thorns and Roses here). Getting the book in a book box was a bonus, and the contents of the box were gorgeous; it’s my favourite box so far.

I developed a terrible book hangover after finishing A Court of Wings and Ruin. I actually didn’t pick up another book for several days, I just wanted to stay in Feyre’s and Rhysand’s world. It’s now been a couple of weeks and I’m still struggling to get really enthused about a new read! Luckily the contents of the book box are keeping me happy.

Included in this box is the book (I chose the UK paperback version as it matched my other books), A Night Court tote bag by Paperly & Co, a smelly candle by Kool & Co, a beautiful Feysand bookmark by Read And Wonder, a ribbon bookmark by Charmed Fiction, a cute baby Rhysand sticker by Taratjah, an art print by Charlie Bowater, and a really big button pin by Evie Bookish.

It’s difficult to decide which is my favourite item in the ACOWAR box, it’s all pretty awesome, but I was especially impressed with the bookmarks. And the bag… and the artwork… and the button…
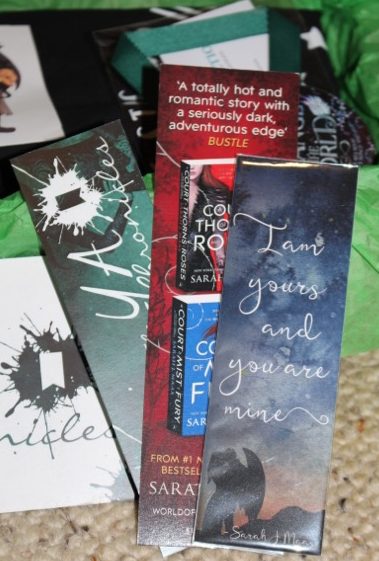
Lovely bookmarks.

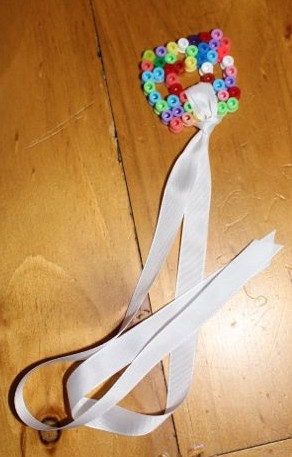
Pretty ribbon bookmark.


It’s going to be hard to top this box!

If you’re interested in getting a young adult book box subscription, hop on over to The YA Chronicles.

SaveSave

Advertisement

Gum Leaf Bookmarks

Standard

Every house seems to have a sock-eating monster, but I think our resident sock-eating monster has a mate that only likes to eat bookmarks! It’s the only possible explanation 🙂 We like making bookmarks, and we even have a special holder for them, yet every time I want a bookmark, they all seem to be MIA. So here we go, making more bookmarks!

A and I collected some large, dry gum leaves from under some of the the big gums nearby. We looked for reasonably flat and undamaged leaves. A found a very pretty pinkish leaf that she liked.

IMG_6152We used permanent metallic markers to write messages on the leaves. The girls worte “Merry Christmas” on many of the leaves, and then signed their names, so that these bookmarks could be given to their teachers as part of their end of year presents.

We had to wait for the metallic ink to dry completely before laminating the leaves. I managed to get about three leaves to each laminating pouch. After the laminating was done I carefully cut around the leaves, making sure to leave a border of sealed laminate around each one.

These unique bookmarks were quick and simple. They were well received by the teachers too.

IMG_6154

Hand-print Bookmarks

Standard

IMG_4472For Mother’s Day this year we made bookmarks using the hand-prints of the kids. I found some old scrapbooking papers that had pink or blue heart patterns on them to use as our base for the hand-prints.

Using the paint pad.

Using the paint pad.

A's hand-prints.

A’s hand-prints.

Each child chose the background paper to use, and the colour of paint for their hand-print. Predictably A chose pink on pink for her bookmarks. L used the rainbow paint pad for her hand-prints on the back on the blue paper.  Unfortunately the rainbow paint didn’t come out as clearly as the other paint, but L liked it as it was. The boys used blue paint on blue paper. Using paint pads for hand-prints makes it easy to get a good amount of paint on the hand, and is much less messy than using conventional paint.

Hand-prints.

Hand-prints.

After the hand-prints were dry, I carefully cut around each hand. The kids wrote some lovely messages on the back of one of their hands using a marker. A pushed down her marker quite hard, and the ink is visible through the hand-print. She also drew a lot of love hearts! I love it because it is so unique.

Writing a message on the back of the hand-print.

Writing a message on the back of the hand-print.

To finish the bookmarks I laminated the hand-prints. I arranged the hand-prints so that A’s hands and Baby T’s hands were together to make a bigger bookmark each, while L’s hand-print was big enough as one. I also did a single print of my hand to make a bookmark for my mum. Once laminated, I carefully cut around the hand-prints so that there was a small amount of plastic laminate around each one. The kids were happy with their bookmarks.

One of the boy's bookmarks.

One of the boy’s bookmarks.

A hand-print bookmark in my latest read.

A hand-print bookmark in my latest read.

Rainbow Bookmarks

Standard

I really love my laminator, it is so useful! Apart from preserving the children’s awards and other valuable mementos, it makes creating unique and durable bookmarks a breeze.

IMG_1942

For these fantastic rainbow bookmarks, we used colour diffusing paper (I bought it from Modern Teaching Aids). This sort of paper sucks up the colour and spreads it and mixes it, creating unusual and interesting patterns. Paper towel and coffee filters also provide a similar effect. This paper works well with water colour paints. Using felt tip markers (textas) to draw on the paper, and then using a spray bottle to wet the paper will also cause the colour to spread and mix. But for bright, vibrant colours, we always come back to using a few drops of food colouring in a small amount of water.

The kids used pipettes to place the coloured water onto the paper. They did big squirts and little drops, lines and puddles, using a range of colours. They enjoyed watching the colour spread out, and making new colours by overlapping the food colouring. They filled up each page with brilliant colour, and in A’s case, so much colour that some of the paper was actually dripping when I laid it out to dry!

A tray of food colouring and pipettes.

A tray of food colouring and pipettes.

Big spots.

Big spots.

And little dots. The blue and red puddle is mixing to give purple.

And little dots. The blue and red puddle is mixing to give purple.

Making lines.

Making lines.


I laid each of the wet pages out on a piece of scrap cardboard to dry flat.


Once these pages are dry, we can use them as beautiful and unique papers for any of our paper crafts.

Still wet paper.

Still wet paper.

Still wet. The pattern from the much mat can be seen through it.

Still wet. The pattern from the much mat can be seen through it.


A chose one sheet of paper to use for our bookmarks. The page was 30cm long, so I cut out six bookmarks, each 5cm across, by the width of the paper. I drew a faint pencil line on the back of the paper using a ruler to keep it straight, and then cut them apart. We fit three of these paper strips into an A4 laminating pocket, leaving plenty of room between the strips to make sure the plastic was properly sealed around the paper. L helped me position the laminating pocket and feed it into the laminator. It only takes a few moments for the laminating to finish, and then a few more to cool down.

The same page, dry and ready to use.

The same page, dry and ready to use.

I carefully cut the new bookmarks apart from each other, leaving a border of plastic seal around each one. I rounded the corners of each bookmark to remove the sharp point. L punched a hole in the top of each bookmark, and chose a ribbon to thread through the top. Once the ribbons were tied, the bookmarks were finished and ready to be used.

The paper cut into strips.

The paper cut into strips.

In the laminating pocket ready to be laminated.

In the laminating pocket ready to be laminated.


Finished bookmarks.

Finished bookmarks.


Melty Beads Bookmarks

Standard

IMG_8039All of us are guilty of reading several books at once, leaving bookmarks in them, and forgetting to replace our bookmarks when we are done. L made a lovely bookmark holder out of pop-sticks a couple of weeks ago which is helping us to keep our bookmarks together, but we could do with some more to add to our collection. We were browsing through a Hama Beads Inspiration booklet when we saw some bookmarks made from the beads and some ribbon. We decided to have a go at making some bookmarks like this, though we made up our own bead designs.

IMG_8035

L made this design on our penguin pegboard.

L made this design on our penguin pegboard.

Each of our designs included a hole for the ribbon to be attached, and we tried not to make them too big or they would have been too heavy to stay in the book. Since each one wasn’t very big, we used a few of the smaller pegboards to create them.

IMG_8038I ironed the beads together and when they were cool we threaded some ribbon through the hole we’d left, and tied it off. We made the ribbon long enough that it would lie right along the height of our books and poke out the bottom.

These make for some very cute little bookmarks, and they were really easy to make. L particularly liked that she could make any shape or design she liked with any colours.

L's new bookmark in one of our books.

L’s new bookmark in one of our books.

IMG_8036