We wanted to make Big L a special cake for his birthday this year, but none of us had any good ideas. I remembered seeing a cake with lots of different chocolates on it ages back on Facebook, so I went looking for it online. I’m not sure that I found the exact one, as there were quite a number, but the one on BakingMad.com was pretty close. It said to use chocolate cake, but I thought that would be a bit over-the-top chocolate, so we used butter cake instead.

Cakes with the tops cut off.

The stacked cake ready for icing.
I baked two round butter cakes and let them cool. Then I cut the tops off each cake to make them flat. I spread some plain frosting over the top of the first cake, and then up-ended the second cake onto the first. This provided a flat top to work with, without the crumbiness of the cut surface. I covered the whole cake in plain frosting, and then it was time to decorate!
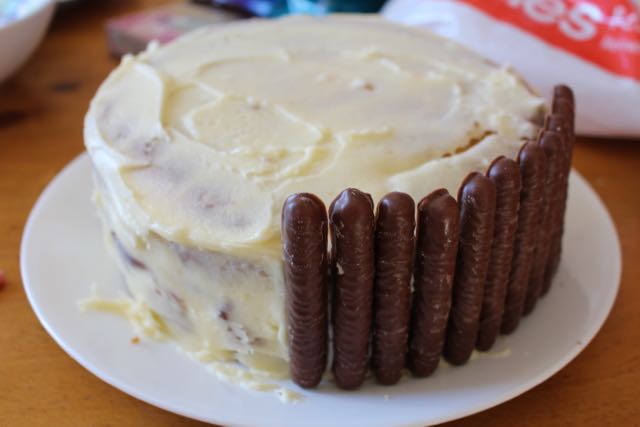
Placing the chocolate finger biscuits around the edge.

The divided top.
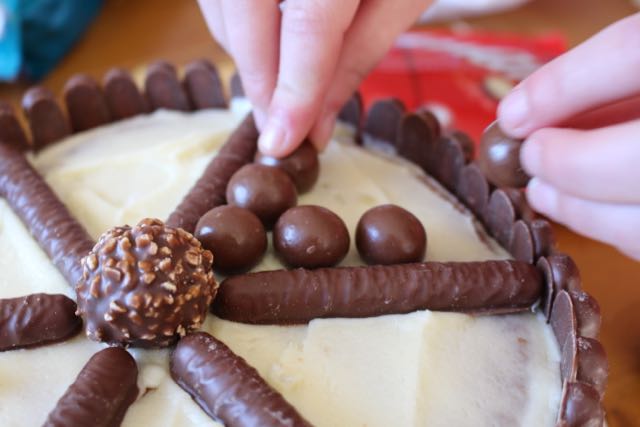
Adding Maltesers to the top of the cake.
I started by pressing the chocolate finger biscuits carefully around the edge of the cake, as if I was making a fence. On the top, we divided the space into sixths using the chocolate finger biscuits as dividers. The biscuits didn’t meet at the centre, so we placed a single Ferrero Rocher chocolate in the middle of the biscuit spokes. Then the kids filled each section with a different type of chocolate. We used Mini M&Ms, mini caramel milkshake eggs, Freddo faces, M&Ms, Cadbury Flake pieces, and Maltesers. Any kind of little chocolates or lollies could have worked for this part.
We added a special birthday candle and it was ready!