Tag Archives: christmas

Snowman Hand Puppet

Standard

IMG_4234
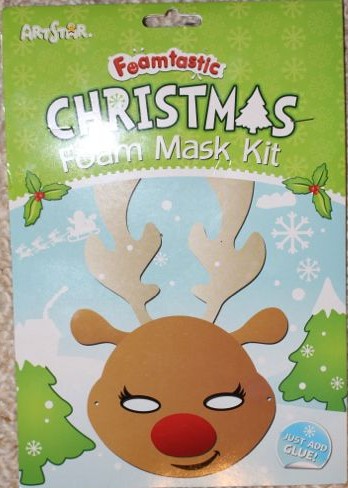
L has been interested in doing some basic sewing of late, so when she picked out her little Christmas kit at Riot Art & Craft, she chose one that involved sewing a felt snowman together. The kit was to make a snowman hand puppet out of felt, and then decorate it as shown in the picture. This was a very easy activity for L, and she completed it quite quickly.

The felt pieces had little holes around the edges for the plastic needle to pass through. L asked me to tie a knot in the yarn at the start, and then she stitched around the edges of the snowman, making sure she didn’t miss any of the holes, and then I tied it off at the end. She got the yarn tangled a couple of times, but it was easy enough to undo and then continue stitching.
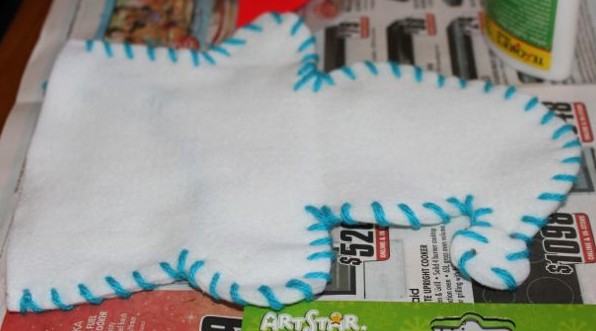
Finished sewing.

Finished sewing.

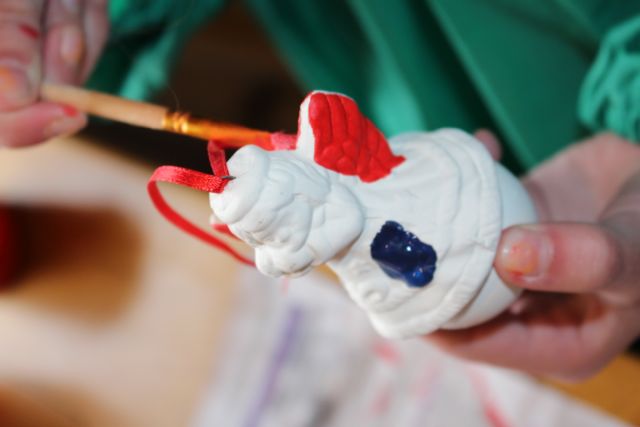
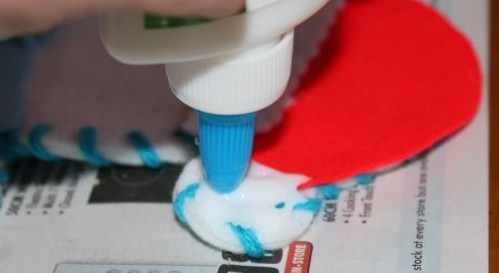
One of the things my kids like about doing craft is that so many craft activities require the use of glue, and this was no exception. Out comes the craft glue, and L was all ready to start gluing on the decorations straight away. I convinced her to put down the glue and lay out the decorations where she wanted them first, to see what it would look like before actually attaching them. Having a plan of action is normally a good thing when crafting 🙂

Adding stars to the scarf.

Adding stars to the scarf.

Gluing on the hat's pom pom.

Gluing on the hat’s pom pom.


Once the adornments were glued down, L was very happy with the result, and rather impatient for it to dry! Finally it was dry, and she was able to use it as a puppet. This was a fairly cheap craft kit that has provided L with lots of amusement.

Ready to play with.

Ready to play with.

Reindeer Foam Mask

Standard

IMG_4017While we were in Riot Art and Craft, the kids each chose a small Christmas craft kit. A picked out this reindeer foam mask, and L got a snowman hand puppet.

We opened the pack and tipped out all the pieces. For some reason there was no piece for the mouth in our pack. Luckily the pieces of foam from where the eye holes are cut out were in the pack, and we were able to cut one of these to make a mouth. A used some glue to stick on the nose, mouth and eye-lashes. Then when that was dry, we turned it over, and stuck on the ears and the antlers. It used a couple of pop-sticks to keep the antlers up straight, and a piece of elastic to hold it on the face.

It was very easy for A to make this mask, and she has been having lots of fun wearing it around. She loves her dress-ups, and it has been a fun addition to her wardrobe.

A wearing her new reindeer mask.

A wearing her new reindeer mask.

Foam Decorations

Standard

Some 3D foam balls, sequins, seed beads, metal pins, paint and Christmas ribbon…. all the ingredients for some great bauble making craft.

My sequined ball...it did take patience to make, but it looks great.

My sequined ball…it did take patience to make, but it looks great.

I started making a bauble by placing a seed bead onto one of the pins, followed by a sequin, and then pushing the pin into the foam ball. I did this over and over to cover the ball. This was a bit too tricky for A to do, first she couldn’t get the seed bead onto the pin, then she dropped the sequin and the pin, and got a little frustrated with the whole project.

A's ribbon bauble.

A’s ribbon bauble.

So we tried for something a little simpler. For her first bauble we used three different Christmas ribbons, and wrapped them around the foam ball. I held the ribbon still while A secured each one with some of the pins. We continued to do this until the ball was covered in ribbons. I then tied a piece of thin silver thread to one of the pin heads (and glued it down)to hang it by. I think the result is quite nice, and it was much quicker and easier than the bauble I made with the sequins!

L working on her sequined bauble.

L working on her sequined bauble.

L also had a go at putting sequins and seed beads on a foam ball. She decided to place her pins randomly over the ball, rather than cover the whole thing because that would take too much time! As it was, she became tired of trying to get the tiny seed beads onto the pins after about a dozen or so. She wants to come back to hers later.

To make some more decorations, A painted another foam ball and a foam star with gold paint. Once the paint was dry she glued sequins randomly over the shapes. We added some Christmas ribbon to hang them up. These were much easier for her to complete on her own, and she was happy with the result.

A's painted star. The other side was red with sequins.

A’s painted star. The other side was red with sequins.

A's painted ball with some sequins.

A’s painted ball with some sequins.


The kids loved hanging their own decorations up on the tree.

Christmas Wreaths

Standard

Our first project using items from the Riot Art & Craft Christmas Showbag was a wreath.

The 3D foam wreath shape.

The 3D foam wreath shape.

Painting the wreath.

Painting the wreath.

A painted her foam wreath using red, green and blue paint. She wanted to have coloured sections, so while she painted the majority of the wreath, I helped her by painting smooth edges for each section. Once the wreath was dry, A turned it over and painted the other side to match. the paint dried quite quickly, and we were soon able to come back and decorate it.

First we wrapped one of the Christmas ribbons around and around the wreath, and secured it with a couple of metal pins. I put the pins in because they were sharp, and a bit fiddly for A to get in straight.

Adding glitter glue.

Adding glitter glue.


The gaps between where the ribbon lay seemed a little boring to A, so she decided to use silver glitter glue to enhance it. She put great globs of glitter glue of each part of the wreath that wasn’t covered in ribbon, and then she used a paint brush to spread it out. We finished it off by adding a piece of ribbon to the top of it so that it could be hung up. A very proudly hung it on the front door.


Hanging on the front door.

Hanging on the front door.

Christmas Paper Chains

Standard

IMG_3770I think most people have made paper chains for Christmas at some point during their childhoods. It is simple, fun, and they look very festive hanging up around the place. We had a scrap booking pad of Christmas papers, stickers and cut-outs from Lincraft, so we used some of the paper out of that to make the strips. I used a 30cm ruler to draw some lines on the back of the paper, so that the kids could cut along them to make the strips we would need. Each strip was the width of the ruler. L was quite good at cutting along these lines, A’s cutting was a bit more jagged, so she mostly left the cutting to L and I.  Once we had our strips, I showed the kids how to loop them and secure the ends together. L used the stapler to join hers, and A used sticky tape, as she found the stapler a bit hard to close.

Cutting the strips.

Cutting the strips.

Stapling the loops together.

Stapling the loops together.


They continued to loop new strips together to make long chains. We then hung them up along the top of one of our doorways with blu-tack. It’s the start of our Christmas decorating. IMG_3769

Plaster Christmas Decorations

Standard
Christmas decoration kits, one boot and one angel.

Christmas decoration kits, one boot and one angel.

I picked up these little plaster decoration kits at Coles whilst doing the grocery shopping last week. The kids picked one each, and sat down to paint them yesterday. Each kit came with a little paintbrush and three paint pots in the primary colours. I suggested they could mix the colours to form new colours. They did a little bit of colour mixing, but mostly they just wanted to paint with the colours they were given.

A painting her decoration.

A painting her decoration.

L painting her angel.

L painting her angel.


They had fun painting these decorations, and can’t wait to hang them up on the Christmas tree. Until then, A has hung hers up above her bed because she likes it so much 🙂

IMG_3684


Paper Plate Santa

Standard

November seems to be passing rather quickly now, so it’s time to break out the Christmas craft!

This Santa uses two paper plates, one for the face, and a second cut in quarters to use for his hat and his beard. A painted one of the quarters bright red, and then we left it to dry. I glued another of the quarters to the bottom of the plate so that the edges of the quarter were against the edges of the plate, leaving a triangle to form the beard on. A painted the main plate a pale pink for skin. Once all the paint was dry I glued the red quarter to the opposite side of the plate to the beard quarter, again lining up the edges.

Painting the hat.

Painting the hat.

And now for the fun of gluing on cotton balls! A used PVA to attach cotton balls all over the bottom triangle and part way up the plate to form a white woolly beard. She continued the cotton balls up the sides of the plate for hair. She also put cotton balls along the bottom edge of the red quarter to make a furry edge for the hat. One cotton ball went onto the point of the hat too.

To finish Santa’s face, A used a light pink pom pom for Santa’s nose, and drew two green circles in texta for eyes. I added some black dots to the eyes for pupils. IMG_3673