The kids have been interested (possibly obsessed) with dinosaurs for a long time. Yet again this year, L asked for a dinosaur cake for her birthday, and a dinosaur themed party. I think this is the fourth year running I have made a dinosaur cake for her. The first couple were epic dinosaur scenes, with waterfall, stream, beach, trees and lots of little figures. It took hours and hours to create, so this time I offered a simpler dinosaur cake. L asked for a stegosaurus, so a stegosaurus it was.

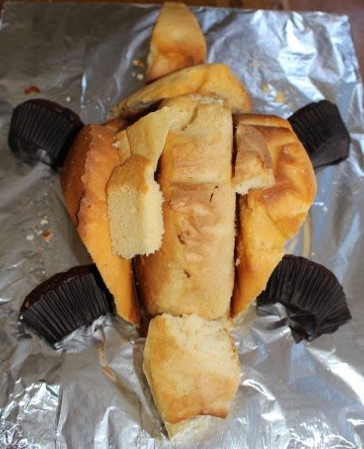
Initially, Big L made two round butter cakes for me to use. I created the body, head and tail from these cakes, and then I used two halved double choc muffins for the legs. I cut one of the cakes just past the half-way point, to create the centre piece of the body, which I flanked with semi circular pieces of cake from the other cake. I shaped these pieces of cake to create a curved body. I used the left over cake to build the body into a nice dome shape, with a tail at one end and a head at the other. I know it looks a little choppy using the little pieces to get the shape I wanted, but once it is covered in butter cream, it looks very different. The cake is built up on our cake board, which is just a sheet of plywood covered in aluminium foil.

Stacked up in position.

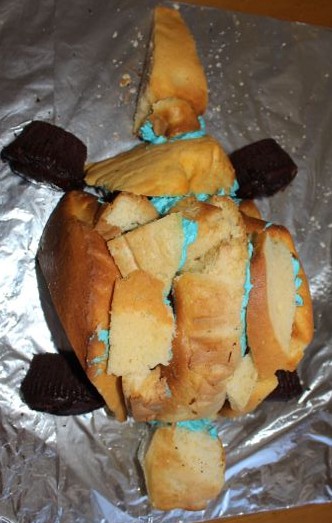
Stuck together with icing.
L and A helped Big L make the butter cream icing. L now likes to use the mixer, despite years of her running from the room whenever we turned it on. A doesn’t much like the noise, but it has never stopped her from seeking out a beater to lick when the mixing is done.
L chose to make the stegosaurus purple and pink. The initial batch of blue butter cream was used to stick the loose pieces of cake together before starting the main icing of the body, and wasn’t seen on the outside of the finished cake.
I carefully spread the purple butter cream over the body, making sure not to miss any sections. I used a spatula to pat the icing all over the body to give the icing a rough texture. After I’d spread pink butter cream over the head, tail and legs, I also roughened this icing with the spatula.

The roughened texture of the butter cream on the body of the stegosaurus.

The completed icing layer.
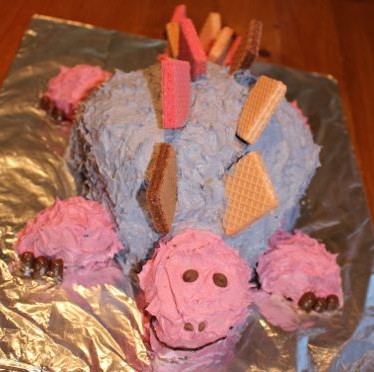
Then it was time to decorate! I used square wafer biscuits as the back and tail plates. The spikes on the end of the tail were chocolate bullets. I cut some chocolate bullets in half and stuck them on the front of the legs to make toenails.
For the face, I had some fudge writing icing in the fridge, which I used to make a smile on the stegosaurus, and then we added two choc chips for eyes and two mini choc chips for nostrils. L called the finished cake Stegi, though naming it didn’t prevent her from eating any of it!
This was a really simple stegosaurus cake that the kids loved. And it tasted good too!

Stegi the Stegosaurus cake.