Author Archives: TodayWeDid

Unknown's avatar

About TodayWeDid

I spend my time sharing my love of reading, arts and crafts with my four children. I also review children's and YA books.

The Barrumbi Kids by Leonie Norrington

Standard

IMG_2443
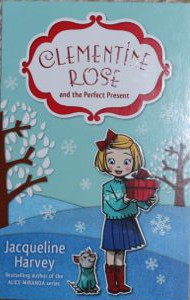
The Barrumbi Kids by Leonie Norrington, paperback novel, 196 pages, first published by Omnibus Books in 2002, this edition published by Omnibus Books in 2014.

Dale and Tomias are best friends living in a remote village in the Northern Territory of Australia. Long Hole and surrounds is Tomias’ ancestral land, and Dale’s ancestors were the first white family to settle in the area. They are part of the land, as the land is part of them, though they are still learning to use and respect it, and all the creatures within it. The boys attend the only school in town, along with their siblings and cousins. The boys spend their last year of schooling in Long Hole learning about themselves, their cultures,  overcoming the school bully and getting into plenty of scrapes along the way.

The Barrumbi Kids is a story of friendship and cultural interaction between aborigines and white people. It is also an insightful view of remote communities, and the people that live there. The realities of bush fires and crocodiles, snakes and floods, rural schooling and harsh weather conditions is a constant theme through the story, which also explores the theme of growing up in, what is, for many, a very different environment to their own.

The speech of the characters and the construction of their sentences has been written to imitate the actual language of the area. I found the small glossary of Mayali language and commonly used words at the back of the book useful, though most of it was explained within the story itself. This use of language definitely gave the story a more authentic and unique feel.

An interesting and different read, The Barrumbi Kids is well written, and suitable for middle to upper primary school children and older. The story was funny at times, especially when the kids explored the chook shed, though also slightly scary when Lizzie was being chased by a crocodile, a highlight of the daily dangers faced by the kids in remote Australia. I liked the relationships between the characters, especially that between Tomias and Dale, who are so different, yet so similar. The elders were portrayed well, and I quite liked old Caroleena. I could picture Mrs Armstrong’s sour face so clearly, and her fit of terror over the snake. That had me laughing too.

I’m happy for my second grader to read this book. I expect plenty of questions as she reads it, since the lives of the children in the story are quite different to her experiences. It is good to read something outside our own little sense of the world, I think reading The Barrumbi Kids will encourage her to want to know more about the outback of Australia and about the first settlers to this beautiful land.


* The Barrumbi Kids was an honours books for the 2003 Children’s Book Council of Australia Book of the Year in the Younger Readers category.

Ice-cream Cone Cupcakes

Standard

IMG_2351We had a birthday on a school day for the first time recently, and A asked me to make cupcakes to take along for her class to share. She had seen cupcakes made in mini ice-cream cones somewhere before, and suggested we could make some. I did do a trial run before the big day to make sure I had it right. It turned out to be a rather easy undertaking, and I have made several batches now with great success.

I have used a few different brands of mini ice-cream cones, and have found that the square based cones seem to be a bit more stable than the round based ones when the cake mix is in them, but both work quite well.

Ready for baking.

Ready for baking.

A drippy cone.

A drippy cone.

I lined the cones up on a baking tray, in this instance I used pizza trays, and then fill the cones to about two-thirds full with cake mix. I have only used butter cake mix for these cupcakes, but I’m sure it’s only a matter of time before the kids ask for them made with chocolate cake! I have been baking these cupcakes at a slightly lower temperature than normal, and I check them regularly to prevent overcooking. Sometimes a bit of the cake mix will overflow the cone and drip down the side, but if too much overflows, the cone goes soggy and collapses! So it’s important not to overfill the cones.

IMG_2347

Cooling.

Once the cupcakes have cooled down, I used a basic butter cream frosting to ice the top of the cupcakes. I placed the sprinkles in a bowl, and then dipped the frosted cones into the sprinkles, making sure the tops were completely covered in sprinkles.

The kids in A’s class were delighted with the ice-cream cone cupcakes, and were amazed to find the cones filled with cake and not ice-cream! They were a big hit, and made A very happy.

A frosted cupcake.

A frosted cupcake.

Dipping the cupcakes in sprinkles.

Dipping the cupcakes in sprinkles.

Calico Bags

Standard
A spotty calico bag.

A spotty calico bag.

We have re-usable bags of all shapes, sizes, and colours. Some of my favourite bags are the calico ones, they are lightweight and scrunch up small enough to carry in my bag. They are great for shopping and make perfect library bags, but they can be a bit boring to look at, so we took fabric paint to some new calico bags to make them unique and appealing.

The tin of fabric paint.

The tin of fabric paint.

Squeezy bottles of paint.

Squeezy bottles of paint.

A while ago my mother had given me a tin of old fabric paint tubes. She wasn’t sure if they were any good, but thought I might like to try them out. As we went through the tin we found only a couple of the tubes were dried out completely, but almost all of the nozzles were clogged. For these tubes, I cut the end off them to access the paint. There were also some 3D fabric paints in squeezy bottles that were still fine to use too.

Making hand prints.

Making hand prints.

We set out our calico bags with a piece of cardboard inside to prevent the paint from seeping through to the other side, and pegged the bag taunt to make it easier to paint. The kids did hand prints, used stampers, paint brushes, and squeezed the 3D paint directly onto the bags to make each one special. They had a ball. And when all the bags were finished, we waited until then were touch dry, and turned them over and did the other side.

Stamping.

Stamping.

Squeezing on 3D paint.

Squeezing on 3D paint.

Brushing on paint.

Brushing on paint.

Splotching paint on.

Splotching paint on.

Spreading the paint.

Spreading the paint.


By the time we were finished, we were all covered in paint, but we had had fun. Some of the paint didn’t come off as easily as others, and I needed to use some mineral turpentine to remove it from our hands and brushes. The kids thought it was super disgusting! Next time we buy fabric paint I will be checking to make sure it will wash off with soapy water.

Once fully dry, I heat set the paint with the iron. I used a tea towel over the design whilst ironing to protect the design, and prevent any stray bits of paint adhering to my iron. The finished bags look great, and are much more fun than the plain ones!

Dinosaur stamped bag.

Dinosaur stamped bag.

Hand print bag.

Hand print bag.

Rainbow Bookmarks

Standard

I really love my laminator, it is so useful! Apart from preserving the children’s awards and other valuable mementos, it makes creating unique and durable bookmarks a breeze.

IMG_1942

For these fantastic rainbow bookmarks, we used colour diffusing paper (I bought it from Modern Teaching Aids). This sort of paper sucks up the colour and spreads it and mixes it, creating unusual and interesting patterns. Paper towel and coffee filters also provide a similar effect. This paper works well with water colour paints. Using felt tip markers (textas) to draw on the paper, and then using a spray bottle to wet the paper will also cause the colour to spread and mix. But for bright, vibrant colours, we always come back to using a few drops of food colouring in a small amount of water.

The kids used pipettes to place the coloured water onto the paper. They did big squirts and little drops, lines and puddles, using a range of colours. They enjoyed watching the colour spread out, and making new colours by overlapping the food colouring. They filled up each page with brilliant colour, and in A’s case, so much colour that some of the paper was actually dripping when I laid it out to dry!

A tray of food colouring and pipettes.

A tray of food colouring and pipettes.

Big spots.

Big spots.

And little dots. The blue and red puddle is mixing to give purple.

And little dots. The blue and red puddle is mixing to give purple.

Making lines.

Making lines.


I laid each of the wet pages out on a piece of scrap cardboard to dry flat.


Once these pages are dry, we can use them as beautiful and unique papers for any of our paper crafts.

Still wet paper.

Still wet paper.

Still wet. The pattern from the much mat can be seen through it.

Still wet. The pattern from the much mat can be seen through it.


A chose one sheet of paper to use for our bookmarks. The page was 30cm long, so I cut out six bookmarks, each 5cm across, by the width of the paper. I drew a faint pencil line on the back of the paper using a ruler to keep it straight, and then cut them apart. We fit three of these paper strips into an A4 laminating pocket, leaving plenty of room between the strips to make sure the plastic was properly sealed around the paper. L helped me position the laminating pocket and feed it into the laminator. It only takes a few moments for the laminating to finish, and then a few more to cool down.

The same page, dry and ready to use.

The same page, dry and ready to use.

I carefully cut the new bookmarks apart from each other, leaving a border of plastic seal around each one. I rounded the corners of each bookmark to remove the sharp point. L punched a hole in the top of each bookmark, and chose a ribbon to thread through the top. Once the ribbons were tied, the bookmarks were finished and ready to be used.

The paper cut into strips.

The paper cut into strips.

In the laminating pocket ready to be laminated.

In the laminating pocket ready to be laminated.


Finished bookmarks.

Finished bookmarks.


Cardboard Roll Trees

Standard

Making play trees is quite easy using some simple materials, such as cardboard rolls, tissue paper and streamers. Using cardboard rolls of different length or width can make an even more interesting forest of play trees.

IMG_1678

We made four different trees to play animals and dinosaurs with.  A chose to make our play trees green because “trees are meant to be green mummy!”, but I think we could have made trees in other colours to play with. I like the idea of a magical forest of pink and purple trees to play with our fairies and unicorns!

IMG_1658

Strips of streamers.

Strips of streamers.

The first tree uses green streamers as the leaves. We had streamers in a few shades of green, so we used strips of each on our tree, but one colour would have been fine also.

The strips taped together.

The strips taped together.

We cut the streamers into strips, and laid them in a pile. Then A twisted the end of the pile together and used sticky tape to secure it. She placed the bundle of streamers into one end of a cardboard roll and taped it down. She fluffed out the streamers in all directions to create the top of the tree. A has been referring to this tree as her “jungle tree”.

IMG_16690

Taping on the tissue paper circle.

Taping on the tissue paper circle.

Adding more layers of tissue paper.

Adding more layers of tissue paper.

The second tree used tissue paper circles for the foliage. A placed a cardboard roll onto the centre of a circle of tissue paper and taped it down. Then she turned it up the right way and used a dot of glue in the centre of the tissue paper circle to attach another circle to the first, and then a third one on top of that. We used four or five pieces of tissue paper, but adding more would have made a puffier tree. Once the glue had dried, we were able to shape the tissue paper to create layers of foliage.

IMG_1668

A cut strip of paper.

A cut strip of paper.

The first leaf attached.

The first leaf attached.

The next tree has foliage made from sheets of green paper. We cut the paper into strips, and then placed small cuts into both sides of these strips to create leaves that A thought look like palm leaves. The key is not to cut right through the strip, though A had a little trouble with this and we ended up with a few short leaves! We left a section at one end of each leaf uncut, where we could attach each leaf to a cardboard roll. A taped the leaves to the outside of the roll, and then let the leaves flop outwards and down. This was her favourite tree.

IMG_1663

Putting the tissue paper into the cardboard roll.

Putting the tissue paper into the cardboard roll.

The last tree was the simplest of all. A loosely rolled one end of a sheet of tissue paper and inserted it into a cardboard roll. She used a piece of tape to secure it, and then scrunched and shaped the tissue paper into a ball shape to create the tree’s leaves. She added a few pieces of tape to keep the tissue paper attached to the cardboard roll.

A was very happy with her cardboard roll trees, and used them to create fun play scenes with her animal and dinosaur figurines.

A very happy girl with her new trees and her animals.

A very happy girl with her new trees and her animals.

Paper Bowl Ladybird

Standard

IMG_17471

The kids are very excited by bugs at the moment, and they think ladybirds are particularly nice. They made a ladybird each from a paper bowl.

Painting.

Painting.

The faded colour of the painted bowls.

The faded colour of the painted bowls.

They started by painting their upside-down bowls with red paint. The tube stated “Rockin’ Red”, but it looked far more pink on the bowl. We did three coats of red paint on each bowl, but it still looked pinkish and thin. It’s a new tube of paint, and I’m quite disappointed in it, I was hoping for a more vibrant red for our ladybirds. No matter though, the kids still liked the colour!

Gluing on spots.

Gluing on spots.

I cut out the heads from some black foam, and the kids glued them onto the ladybirds’ bodies. They stuck on eye stickers, and added a curled black pipe cleaner for antennae. They also glued on lots of black paper dots that I had cut out earlier.

Sticking on the legs.

Sticking on the legs.

Six legs per ladybird made from black pipe cleaners, and sticky taped to the underside of the bowl, and they were finished. The kids are very proud of their new ladybird friends.

A's ladybird.

A’s ladybird.

L's ladybird.

L’s ladybird.


Body Measurements

Standard

To practice using rulers and tape measures (and reading them accurately!) we spent an hour or so measuring different parts of our bodies.

L marking out her foot to measure it.

L marking out her foot to measure it.

Measuring A's hand with the ruler.

Measuring A’s hand with the ruler.

Both L and A stood on a sheet of paper and placed a mark along the back of their heel, and at the top of their big toes. They then used a ruler to measure how long their feet are. Both of them found their left feet to be slightly longer than the right. They also used the rulers to measure the length of their hands, from the circlet of wrinkles at the wrist to the end of the middle finger. L drew around her hand carefully and then measured the length of each of her fingers.

L tracing around her hand.

L tracing around her hand.

L measuring around her waist.

L measuring around her waist.

Measuring my ankle.

Measuring my ankle.


L used a tape measure to measure around her waist, but the first few times she read off the inches side, and had to try again to get centimetres. They also used the tape measure to measure around our ankles, wrists, upper arms and heads. They compared all of the measurements. They were quite amazed that the left side of the body can be different to the right side. They also discovered that my head isn’t that much bigger than L’s!

Even the bunny got in on it!

Even the bunny got in on it!

This was a simple activity that needed no preparation to organise, but it gave the kids plenty of practice measuring things. Being able to measure accurately and consistently is an important skill, and we will be practicing it more in the future.

The Maze Runner by James Dashner

Standard

IMG_1710The Maze Runner by James Dashner, paperback novel, 371 pages, first published by Delacorte Press in 2010, this edition published by The Chicken House in 2011.

All that Thomas can remember is his first name. There are brief images from his past life, but no details, no faces, no context. He quickly discovers he is not the only boy to enter the Glade with his memories curiously removed. The Glade is situated in the middle of a vast and complicated stone maze, trapping the boys there, with no idea who sent them and why, or how to escape. The Maze crawls with horrible and deadly creatures, called grievers, by night, and sometimes during the day, preying on the boys, making it even harder to find the solution. They can’t give up though, there must be a way to escape their imprisonment, a way to make it home, even if they can’t remember where or what home is anymore. Things in the Glade have been the same day in, day out for two years, but after Thomas arrives, things begin to change. Is Thomas the cause or is he there to help them? Even Thomas doesn’t have an answer to that yet, but he will give it his all to find out.

James Dashner has created a whole new and terrifying world in The Maze Runner. It is an excellent read most suitable for upper primary and high school students, though adults are sure to enjoy it as well. I found it to be an exciting page-turner that I stayed up late to finish reading, something I don’t do much any more with three young children, but I just couldn’t put it down until I discovered what became of Thomas and the Gladers.

The world of the Gladers developed around me as I read, with the different parts of the Glade becoming clear, and the characters so life-like. The characters were easily envisioned, with Chuck’s constant chatter, Alby’s temper,  Newt’s determination, and Minho’s hope. Thomas is a little different to the other boys, but very likeable, I really wanted him to find the truth and be the one that lead the boys to victory. Theresa, the only girl in the story is a bit of an enigma, but I thought her roughness and pluck were perfectly suited to her role in the story. A wonderful cast of characters, in a truly well told tale of adventure, mystery, danger and excitement.

I bought this book thinking it was a stand-alone novel, so I was very excited to discover that it is just the first book in a series! I will be getting my hands on the sequel as soon as possible 🙂


Clementine Rose and the Perfect Present by Jacqueline Harvey

Standard

IMG_1702Clementine Rose and the Perfect Present by Jacqueline Harvey, paperback novel, 147 pages, published by Random House Australia in 2013.

A huge wedding is scheduled to occur at Penberthy House, and it is all hands on deck to make it successful. Unfortunately Uncle Digby becomes ill and is taken to the hospital, accompanied by Lady Clarissa, leaving Aunt Violet in charge of the guests. Clementine Rose does her best to help Aunt Violet, but the grumpy old woman seems to find it impossible to be pleasant! Amidst the growing chaos and excitement at Penberthy House, Clemmie is feeling sad and upset because she hasn’t received an invitation to Angus’ birthday party, and she seems to be the only one in the class left out. She tries to convince herself she doesn’t want to go anyway, but deep down she knows it’s simply not true. Is it a mistake, or is Angus really that mean? And will the wedding be a success even with Aunt Violet at the helm?

Clementine Rose and the Perfect Present is the third installment of the very popular Clementine Rose series. These books are suitable for lower to middle primary age children. I am reading them to my preschooler, and she just loves them, she adores Clemmie and wishes she had a tea-cup pig just like Lavender. My preschooler often tells me that she is glad her teacher is not like Mrs Bottomley, Clemmie’s kindergarten teacher. I can scarcely think of a character less suitable for teaching five year olds than Mrs Bottomley! She is so well written that my preschooler scowls every time she is mean to Clemmie, as though she were witnessing these events in her own classroom. My favourite character is definitely Aunt Violet. She can be so obnoxious and rude, yet there is a gentle side that occasionally flashes through her outer veneer of haughtiness. She reminds me of a few old ladies I’ve met! Of course, Clemmie is a weakness for Aunt Violet, and how could she not be? So wonderfully sweet and innocent, and always trying her best, Clementine Rose is an excellent role model for children.

Clementine Rose and the Perfect Present is funny and well written with a scattering of black and white illustrations throughout. The storyline is interesting, yet not too complicated, perfect for the intended audience. My preschooler laughed so hard over Uncle Orville’s antics surrounding the wedding, especially when he hopped into Aunt Violet’s bed accidentally, thinking it was his own. And she was quite relieved that Uncle Digby was going to be okay, and that Angus is becoming nicer all the time.

I am enjoying reading the Clementine Rose books with my preschooler, I love hearing her laugh, and ask for more. She is so excited to read Clemmie, she barely lets me take a breath between books! If you haven’t tried Clementine Rose yet, what are you waiting for?

The Day the Crayons Quit by Drew Daywalt and Oliver Jeffers

Standard

IMG_1698The Day the Crayons Quit by Drew Daywalt and illustrated by Oliver Jeffers, paperback picture book, published by HarperCollins Children’s Books in 2013.

Duncan’s crayons are not happy. Each of them have written him a letter explaining their grievances, and asking him to change the way he uses them. Until then, the crayons are on strike.

A wonderful book for preschool and primary school aged children, The Day the Crayons Quit, is both funny and reflective of the usage of crayons in a child’s pencil case. Each of the crayon’s letters are written with that crayon in a child-like handwriting, which suits the story perfectly. And the letters are just so funny. The crayon illustrations are brilliant, I think I’ve seen a few ‘white cat in the snow’ pictures done by my own children! I particularly love the purple dragon and wizard.

Both my preschooler and second grader love this book. It appeals to their sense of art and colour, as well as making them laugh. I like to share this story with my kids, because I love it too 🙂 I also think my kids would secretly like their own crayons to send them some letters as well!