Author Archives: TodayWeDid

Unknown's avatar

About TodayWeDid

I spend my time sharing my love of reading, arts and crafts with my four children. I also review children's and YA books.

Christmas Trees

Standard

IMG_4030
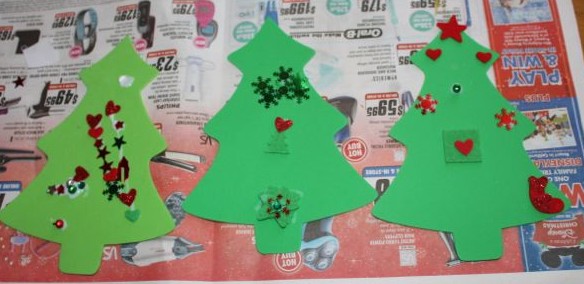
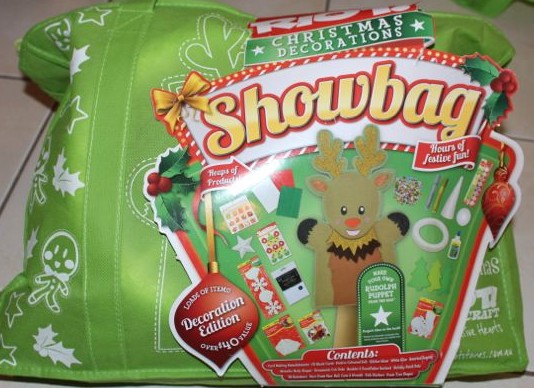
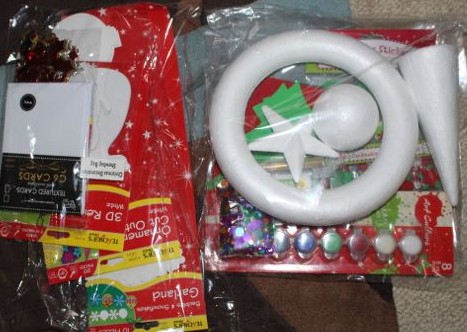
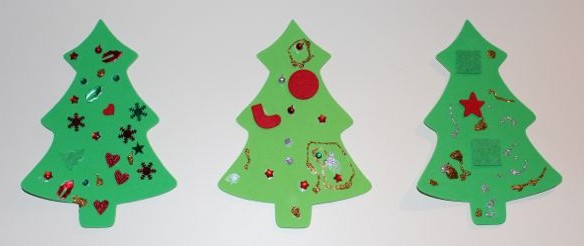
These Christmas tree shapes were in the Christmas bags from Riot Art & Craft, along with a container of Christmas card embellishments. The trees were a thin foam, and there were three each to decorate.

Foam tree shapes.

Foam tree shapes.

Embellishment pack.

Embellishment pack.


Some of the embellishments had paper backing that could be removed to reveal a sticky side to stick straight onto the tree or card. These bits of paper were very hard to remove, and in some cases, we actually pulled the sticky backing right off the embellishment along with the paper. After that we just used craft glue to stick the embellishments onto the trees.

Adding glitter glue.

Adding glitter glue.

Glitter glue in gold and silver added a final touch of sparkle to these great Christmas trees.


IMG_4003

A’s trees.

L's trees.

L’s trees.


Once they were dry we used blu-tack to stick them on our front door.

Foam Santa

Standard

While A was painting her Christmas wreath I decided to use a foam cone and foam ball to make a Santa Claus figure.

IMG_3980

I wanted to use the cone for the body, so I painted it red. I later added a black belt with silver buckle about midway up the cone. For the head, I used the foam ball, first painting it white. His hat was made from a red felt triangle, and the fluffy edge and pom pom on top are both made from cotton balls, as is the beard. Once all that was dry, I started to add facial features, but I didn’t get any further than placing two blue dots for eyes. I found I really liked the way it looked without a nose or mouth.

IMG_3983IMG_3985

Attaching the head to the body was a bit of a challenge, I tried using a long pin inserted into the apex of the cone, and the bottom of the ball, but it wasn’t strong enough. I fiddled with this for ages, using glue and pins, but still the head fell off. I really didn’t want a spontaneously decapitating Santa, so I used plenty of craft glue and attached a pop-stick as a support rod from the body to the head at the back. I had it lined up so the head was in a good position, and I left it to dry, which took ages, but it worked.

With the head finally attached, I cut two red pipe cleaners in half, and used one piece for each limb. I just stuck the sharp point of the pipe cleaner straight into the foam, and then bent them to give my Santa knees and elbows. I thought my Santa was perfect, but Big L said it looked like something out of Tim Burton’s The Night Before Christmas, anyway, I still like it! And the kids liked him too. He sat up on top of our TV throughout the Christmas period, watching to make sure we were all being good 🙂

IMG_4211

Propagating Succulents

Standard

After painting their terracotta pots, the kids wanted to plant something in them. We have a single succulent plant growing out by our letterbox that seems pretty hardy, and I thought it would be fun to try to propagate some new plants from it’s cuttings.

Cuttings drying out.

Cuttings drying out.

The succulent in our garden is a good size, so we were able to take several stem cuttings. We removed the lower leaves from the bottom of each stem. We left the leaves and the cuttings to dry out for a few days.

Succulents generally like well-drained soil, so L collected some red gravel from one of our garden beds to place in the bottom of each pot to improve drainage. She then filled each pot with some cacti and succulent potting mix. My mother had told me to try dipping the base of the cuttings into honey prior to planting them. This is supposed to kill any bacteria on the cutting, and improve growth. I’d never tried this before, but we pulled out some honey and dipped each cutting in. It’s hard to know whether it worked, but all of our cuttings survived, and had new growth on them, so I think we will use honey on our cuttings again in the future. L placed a single stem cutting into each pot, patted the soil down and gently watered them in.

Gravel used for drainage.

Gravel used for drainage.

Adding soil.

Adding soil.


Placing the cuttings into the soil.

Placing the cuttings into the soil.

Patting the soil down around the cutting.

Patting the soil down around the cutting.


We placed them in a sunny spot, and checked on them every day, keeping the soil moist, but not too wet. After a week or so, we noticed some of the cuttings had produced some new leaves, and some little roots had appeared near the base of the stems.

All of these succulents in their decorated pots were given away as Christmas presents, mostly to their teachers. The kids were so proud to show off the pots that they painted and the plants that they had grown. They made unique gifts that were well received and appreciated.

Watered in and ready to grow.

Watered in and ready to grow.

As we began to clean out the laundry this week, in preparation for painting, we discovered some unused pots under the laundry tub. These will make excellent vessels for our next round of succulent growing. I would like to try propagating some cuttings from other types of succulents too.

Glitter Glue Baubles

Standard

IMG_4153I went looking for some plain, smooth baubles to decorate before Christmas. This task was actually harder than I had anticipated, so many of the baubles were already covered in glitter or patterns. I finally found a pack of gold baubles in Target. They were nice and large, which was good for the kids to decorate. I bought a pack of Christmas glitter glue, which included gold, green and red. These little bottles had fine tips and were easy to control.

Plasticine ring.

Plasticine ring.

I made little rings out of plasticine to place the bauble in so that it wouldn’t roll away while we painted them with the glitter glue. This was very effective, but when I asked the kids if they wanted to paint another bauble, they both told me they just wanted to play with the left-over plasticine!

A bauble sitting in its plasticine ring.

A bauble sitting in its plasticine ring.

The kids each decorated a couple of baubles each, making dots, swirls, stripes, stars, trees and writing their names. A used a bit too much glitter glue on one of hers, while painting a Christmas tree. The glitter glue ran, making the tree appear as if it had melted.

The melted Christmas tree.

The melted Christmas tree.

Painting  a bauble.

Painting a bauble.

I used the glitter glue to write each child’s name and the year on a bauble. Once these were dry, I turned them over and drew a star on one, and trees on the other two. The kids liked having a bauble that was made just for them. I also dotted one bauble all over with random spots of the three colours. L liked this one, and had a go at making one the same, though some of her dots were bigger, and ran a little.

Name and year on a bauble.

Name and year on a bauble.

A spotty bauble.

A spotty bauble.

IMG_4240

The kids proudly hung up all of the glitter glue baubles on the tree once they were dry.

Snowman Hand Puppet

Standard

IMG_4234L has been interested in doing some basic sewing of late, so when she picked out her little Christmas kit at Riot Art & Craft, she chose one that involved sewing a felt snowman together. The kit was to make a snowman hand puppet out of felt, and then decorate it as shown in the picture. This was a very easy activity for L, and she completed it quite quickly.

The felt pieces had little holes around the edges for the plastic needle to pass through. L asked me to tie a knot in the yarn at the start, and then she stitched around the edges of the snowman, making sure she didn’t miss any of the holes, and then I tied it off at the end. She got the yarn tangled a couple of times, but it was easy enough to undo and then continue stitching.

Finished sewing.

Finished sewing.

One of the things my kids like about doing craft is that so many craft activities require the use of glue, and this was no exception. Out comes the craft glue, and L was all ready to start gluing on the decorations straight away. I convinced her to put down the glue and lay out the decorations where she wanted them first, to see what it would look like before actually attaching them. Having a plan of action is normally a good thing when crafting 🙂

Adding stars to the scarf.

Adding stars to the scarf.

Gluing on the hat's pom pom.

Gluing on the hat’s pom pom.


Once the adornments were glued down, L was very happy with the result, and rather impatient for it to dry! Finally it was dry, and she was able to use it as a puppet. This was a fairly cheap craft kit that has provided L with lots of amusement.

Ready to play with.

Ready to play with.

Wings & Co: Operation Bunny by Sally Gardner

Standard

IMG_3647Wings & Co: Operation Bunny by Sally Gardner and illustrated by David Roberts, paperback, 185 pages, published by Orion Children’s Books in 2012.

Emily Vole was abandoned in a hatbox as a baby, and she is adopted by the very rich Ronald and Daisy Dashwood. Daisy is very vain and rather stupid, and when she falls pregnant with triplets, she turns Emily from adopted daughter into a Cinderella like slave. Emily works from sun-up to sun-down cleaning, washing, and caring for the triplets. She is not allowed to go to school and has to sleep in the laundry. One day by chance Emily meets her wonderful and elderly neighbour Miss String, and her man-sized talking cat, Fidget. They help and teach Emily, and open her to the world of magic and fairies. When the evil witch, Harpella, comes wreaking vengeance, Emily and Fidget set off on the run. They team up with the grumpy and rather self-important Buster who is a fairy detective, and together they try to destroy the evil Harpella.

I really enjoyed this story, and am looking forward to the next instalment to see what Emily, Fidget and Buster get up to. It was well written with some funky black and white illustrations to enhance the story. I found it to be an entertaining read that I wanted to keep reading to the end. I will be encouraging my first grader to read this, as I think it is suitable for school aged children. Emily is a quirky character with independence and smarts, and I liked her. Fidget was also a good character, with many cat and fish related phrases, and a rather sardonic sense of humour. I will enjoy reading this again to my pre-schooler.

Reindeer Foam Mask

Standard

IMG_4017While we were in Riot Art and Craft, the kids each chose a small Christmas craft kit. A picked out this reindeer foam mask, and L got a snowman hand puppet.

We opened the pack and tipped out all the pieces. For some reason there was no piece for the mouth in our pack. Luckily the pieces of foam from where the eye holes are cut out were in the pack, and we were able to cut one of these to make a mouth. A used some glue to stick on the nose, mouth and eye-lashes. Then when that was dry, we turned it over, and stuck on the ears and the antlers. It used a couple of pop-sticks to keep the antlers up straight, and a piece of elastic to hold it on the face.

It was very easy for A to make this mask, and she has been having lots of fun wearing it around. She loves her dress-ups, and it has been a fun addition to her wardrobe.

A wearing her new reindeer mask.

A wearing her new reindeer mask.

Foam Decorations

Standard

Some 3D foam balls, sequins, seed beads, metal pins, paint and Christmas ribbon…. all the ingredients for some great bauble making craft.

My sequined ball...it did take patience to make, but it looks great.

My sequined ball…it did take patience to make, but it looks great.

I started making a bauble by placing a seed bead onto one of the pins, followed by a sequin, and then pushing the pin into the foam ball. I did this over and over to cover the ball. This was a bit too tricky for A to do, first she couldn’t get the seed bead onto the pin, then she dropped the sequin and the pin, and got a little frustrated with the whole project.

A's ribbon bauble.

A’s ribbon bauble.

So we tried for something a little simpler. For her first bauble we used three different Christmas ribbons, and wrapped them around the foam ball. I held the ribbon still while A secured each one with some of the pins. We continued to do this until the ball was covered in ribbons. I then tied a piece of thin silver thread to one of the pin heads (and glued it down)to hang it by. I think the result is quite nice, and it was much quicker and easier than the bauble I made with the sequins!

L working on her sequined bauble.

L working on her sequined bauble.

L also had a go at putting sequins and seed beads on a foam ball. She decided to place her pins randomly over the ball, rather than cover the whole thing because that would take too much time! As it was, she became tired of trying to get the tiny seed beads onto the pins after about a dozen or so. She wants to come back to hers later.

To make some more decorations, A painted another foam ball and a foam star with gold paint. Once the paint was dry she glued sequins randomly over the shapes. We added some Christmas ribbon to hang them up. These were much easier for her to complete on her own, and she was happy with the result.

A's painted star. The other side was red with sequins.

A’s painted star. The other side was red with sequins.

A's painted ball with some sequins.

A’s painted ball with some sequins.


The kids loved hanging their own decorations up on the tree.

Christmas Wreaths

Standard

Our first project using items from the Riot Art & Craft Christmas Showbag was a wreath.

The 3D foam wreath shape.

The 3D foam wreath shape.

Painting the wreath.

Painting the wreath.

A painted her foam wreath using red, green and blue paint. She wanted to have coloured sections, so while she painted the majority of the wreath, I helped her by painting smooth edges for each section. Once the wreath was dry, A turned it over and painted the other side to match. the paint dried quite quickly, and we were soon able to come back and decorate it.

First we wrapped one of the Christmas ribbons around and around the wreath, and secured it with a couple of metal pins. I put the pins in because they were sharp, and a bit fiddly for A to get in straight.

Adding glitter glue.

Adding glitter glue.


The gaps between where the ribbon lay seemed a little boring to A, so she decided to use silver glitter glue to enhance it. She put great globs of glitter glue of each part of the wreath that wasn’t covered in ribbon, and then she used a paint brush to spread it out. We finished it off by adding a piece of ribbon to the top of it so that it could be hung up. A very proudly hung it on the front door.


Hanging on the front door.

Hanging on the front door.

Riot Art & Craft Christmas Showbag

Standard

I took the kids into Riot Art & Craft looking for some Christmas craft items. They had plenty of things that we could use, and we picked out some foam balls, sequins, glitter glue, and Christmas ribbons. But our best find was the Christmas Showbags which contain a variety of Christmas craft items worth over $40 (according to the label). These bags were on sale for only $15, so L and A got one each.

IMG_3973

I was quite impressed with the contents. Each one contained acrylic paint pots, sequins, four 3D foam shapes, including a wreath, glue, glitter glue, felt, foam tree shapes, Christmas stickers, a Christmas embellishment pack, metallic holly shapes, blank cards, cardboard ornament shapes, bauble and snowflake garlands and 3D cardboard reindeer. This was plenty for us to get on with our Christmas crafting, and we have put some of the items to good use already!

Showbag contents.

Showbag contents.

The bag also has a template for making a reindeer puppet too. We could cut out the template, glue it together and decorate it, but we have lots of other craft to do before we get to that 🙂