Tag Archives: kids in the kitchen

Easter Chocolates

Standard

I wanted to try making some Easter shaped chocolates this year with the kids, as I thought it would be fun. We were given a number of plastic chocolate moulds by a good friend, and my mother also gave us a silicone chocolate mould to try. We started with the silicone mould.

IMG_9124We didn’t make our own chocolate, we used choc melts, in milk chocolate and white chocolate. I melted small batches of the melts in a ceramic bowl in the microwave for about 30 seconds at a time. Each time the microwave dinged, I mixed the chocolate with a spoon to make sure that it was melting evenly and not burning on the bottom of the bowl. It’s very important to remove the spoon from the bowl before it is placed in the microwave!

Chocolate mould.

Chocolate mould.

I did not let the kids handle the bowl with the melted chocolate, as it can be very hot. I used an oven mitt to prevent burning myself on the bowl when removing it from the microwave. After a minute or two it was normally cool enough to touch, but we still had to be very careful.

Mixing the hot chocolate.

Mixing the hot chocolate.

Ready for the fridge.

Ready for the fridge.

As silicone is floppy, we used a plastic cutting board underneath the mould to prevent it from drooping and spilling the chocolate. We transferred the melted chocolate into the mould one spoonful at a time, carefully filling each hole to the top and smoothing it out. Inevitably, we dripped chocolate onto the cutting board, mould and even on the bench. The kids didn’t mind swiping it up on a finger and popping it in their mouths. Once all the holes on the mould were filled, we placed it in the fridge to set.

Placing the chocolates onto the cellophane.

Placing the chocolates onto the cellophane.

We made some plain milk chocolate, some white chocolate, and some we mixed together to marble the chocolate. I also had a go at layering the chocolate. I found it was best to let the first layer set in the fridge for about fifteen minutes before adding the second layer.
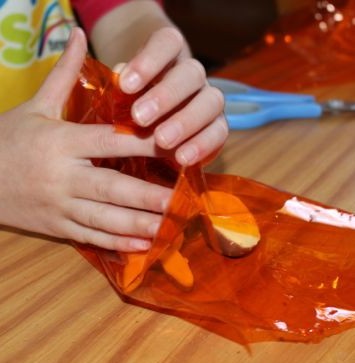
Forming a bundle.

Forming a bundle.

The kids cut some cellophane into squares and placed about four chocolates onto each square, then brought the cellophane up around the chocolates creating a little bundle. We added some curling ribbon to tie it up, and I curled it with scissors. L tried to curl her own ribbon, but she didn’t quite manage it. They want to give their little parcels of Easter chocolates to relatives.

Little parcels of Easter chocolates.

Little parcels of Easter chocolates.

Sheep Cupcakes

Standard

IMG_8959A while ago I saw some of the librarians at our local library had made foods inspired by books, and they had made sheep cupcakes for Where is the Green Sheep? by Mem Fox and Judy Horacek. We own this book, and it gets read over and over to the point where both L and A are able to recite the words! I love the idea of book inspired food, and these sheep cupcakes looked simple enough, so I gave them a go.

Cupcakes ready for icing.

Cupcakes ready for icing.

Big L made a double batch of butter cupcakes, and when they were cool, I iced them with basic vanilla frosting. Then I covered each one with mini-marshmallows (I think the pack called them mallow bakes). I had these in pink and white, so we had some pink sheep and some white sheep.

Covered in mini marshmallows.

Covered in mini marshmallows.

For the heads I used some honeycomb chocolate pods, which are like a small biscuit cup filled with chocolate and come in a number of different flavours (I think they are made by Mars). The filling side of the pods was facing out, and I drew on this using white chocolate writing fudge to form the facial features and ears of each sheep.

It didn’t take me as long as I expected to make these sheep cupcakes, and I was quite happy with the result. Everyone thought they were very yummy too.

IMG_8964

Arrowroot Biscuit Easter Eggs

Standard

IMG_9084We go through a lot of milk arrowroot biscuits in our house, especially baby T, he loves them!

Biscuits and 100s and 1000s ready for decorating.

Biscuits and 100s and 1000s ready for decorating.

Milk arrowroots are oval shaped, and close enough to egg-shaped that we tried decorating them to make some non-chocolate Easter eggs. The icing is quite sweet though, so these aren’t a less sugary alternative to chocolate eggs, but they were fun to make.

I mixed up some icing sugar with a little bit of milk in a bowl, and then I transferred some to a zip lock snack bag. I added some vanilla essence and some food colouring to the bag, sealed it, and squished it all together to mix it. When it was ready to use, I snipped a tiny triangle off one corner so that we could use it as a piping bag. I added a bit too much milk to the first lot of icing so it was a little runny, but the other lots were a better consistency for piping.

Spreading icing with a knife.

Spreading icing with a knife.

Piping icing onto a biscuit.

Piping icing onto a biscuit.

The kids used the icing bags to spread icing across the top of the biscuits, on some making patterns with the colours, on others just covering the whole biscuit in the same colour. On some of them they used a knife to spread the icing out. They added some 100s and 1000s to the top of the biscuits, and some they even dipped in the bowl of 100s and 1000s to completely cover the top.

IMG_9078

This was a very messy activity! There was icing, 100s and 1000s and icing sugar everywhere (including all over the kids), but they had a ball. They also enjoyed eating some of their biscuit eggs along the way 🙂

The mess at the end.

The mess at the end.

Bunny Cake

Standard

IMG_8719Big L made a round buttercake, and I decided we should decorate it as a bunny. It was iced with plain white frosting andIMG_8711 then covered in dessicated coconut.

Bunny ears.

Bunny ears.

The ears were made by gluing some pink foam onto white felt, and then when they were dry, I attached them to the back of the cake using toothpicks, so they were sticking up into the air.

I used both normal sized and mini marshmallows to make the nose and the teeth. The eyes are half a marshmallow with a mini m&m as a pupil. The mouth is made out of writing fudge, but I had lots of trouble getting it into the shape I wanted as it didn’t stick to the coconut very well. By the time I came to make the whiskers I was a bit frustrated with the writing fudge, so I started looking for something else to use. I thought about using liquorice, but we didn’t have anything, so I compromised and used dry spaghetti. I broke the spaghetti into the lengths I wanted and then laid the pieces down as whiskers.

Everyone was very happy with how our bunny cake turned out, and even happier when they were eating it!


Monster Fingers

Standard

IMG_8547

Monster themed finger food just right for a snack or party is monster fingers. A chose to use cheese sticks for this activity, while L chose to use carrot sticks. We used dried strawberries for the finger nails. I was going to use pecan halves or slivered almonds for this, but we’d run out, and the kids couldn’t wait for me to go to the store. I think the dried strawberries worked well though.

Adding dip to the finger to stick the fingernail on.

Adding dip to the finger to stick the fingernail on.

I broke the cheese sticks in half and cut the carrots into sticks. The kids used a little bit of french onion dip to stick the fingernails to the fingers. We could have used cream cheese or something like that to stick them together too.

Adding a fingernail.

Adding a fingernail.

This was pretty quick and easy, fun and tasty. The kids pulled theirs apart to eat them though, as the dried strawberries were quite sweet while the cheese and carrot were not, and they didn’t like the mixed tastes. I think they would have eaten them together if we’d used the nuts instead of strawberries. We can use nuts next time we feel a bit peckish for some monster fingers.

A plateful of monster fingers.

A plateful of monster fingers.

Cupcake Monsters

Standard

IMG_8473

With some frosting, lollies and fudge writing gel, we turned our plain vanilla cupcakes into monster treats. Big L cooked the cupcakes for us and then we decorated them as a family. It was lots of fun, and we ended up with some awesome cupcakes!

IMG_8483IMG_8482


The kids enjoyed spreading the frosting onto each cupcake, though A kept leaning through the work area, and ended up with three shades of frosting all over her. She even tried licking some of it off her elbow!

Spreading the frosting.

Spreading the frosting.

Adding mini marshmallows.

Adding mini marshmallows.


Once the frosting was completed we used a range of lollies, including some strawberry jellies, mini m&ms, yoghurt buttons and mini marshmallows, and some writing fudge, to create our monsters. L used some frosting to stick mini marshmallows together to create long horns. Big L made a Cookie Monster cupcake, complete with mini cookie in his mouth. A just liked using lots of m&ms and marshmallows (and eating them when she thought we weren’t watching!). I used the writing fudge to add pupils to my monsters’ eyes.

Big L's attempt at making Cookie Monster from Sesame Street.

Big L’s attempt at making Cookie Monster from Sesame Street.

IMG_8474IMG_8494


Pizza Pinwheels

Standard
Pizza pinwheels.

Pizza pinwheels.

Along with snacks for the kids lunchboxes, I also like to have snacks for Big L’s lunchbox too. He doesn’t mind a range of cakes and cookies, but for a savoury change, I made him some pizza pinwheels. These are very similar to the cheese and bacon pinwheels we made a few days ago.

After defrosting the puff pastry sheets, I spread one with tomato pizza sauce, and the other with BBQ pizza sauce. To these I added grated cheese, shredded ham, and sliced mushroom. The kids can help with this bit. Sometimes I add other pizza ingredients like pepperoni and pineapple, but I didn’t have these today.

Ingredients.

Ingredients.

Ingredients laid out on the puff pastry.

Ingredients laid out on the puff pastry.


Each sheet of pastry is rolled up into a log, and the edge pinched together to seal it. Then the log is cut into slices, and each slice is transferred to a baking tray covered in baking paper. I add a little grated parmesan to the top of each pinwheel before putting them in the oven to cool until the pastry is golden and the cheese is melted.

These make for a delicious snack or light meal. They freeze well, but for a crispier finish, after defrosting them, I would pop them in the oven for a little while to reheat.

Sliced up log.

Sliced up log.

Laid out ready to cook.

Laid out ready to cook.

Cheese and Bacon Pinwheels

Standard

It’s almost time to return to school for a new year, and I have started the back to school baking. I like to stack the freezer with various snacks and treats ready for lunchboxes, such as muffins, cakes, and slices. One of my favourites are these easy cheese and bacon pinwheels.

Yummy cheese and bacon pinwheels.

Yummy cheese and bacon pinwheels.

More puff pastry, my kids just love puff pastry! While the puff pastry is defrosting on the table, I gather the rest of the ingredients, which is only grated tasty cheese, diced bacon and I like to add a little grated parmesan to the top of each one before cooking them.

Laid out prior to rolling.

Laid out prior to rolling.

I spread the grated cheese over the pastry sheet, and then the bacon pieces, trying to give it a fairly even coverage. This is a great job for the kids, though I have to watch that we don’t end up with all the bacon in one corner! Then I roll the pastry from one edge up into a log, catching all the cheese and bacon inside, and pinch the edge down to seal it. The log is then cut into slices around one to two centimetres in width. These slices are placed on their sides on the baking tray  (I always use baking paper on the tray for ease), I add the grated parmesan then put them in the oven until they are golden.

Rolled up ready for slicing.

Rolled up ready for slicing.

Sliced up.

Sliced up.

Ready for the oven.

Ready for the oven.

These are delicious little savoury bites, and they freeze quite well, though the pastry will not be as crispy after defrosting as it would be straight from the oven.

Pigs-in-Blankets

Standard

Pigs-in-blankets are a great finger food for kids parties, and they are super easy to make!

Cut up into eights.

Cut up into eights.

A frankfurt waiting to be rolled into its pastry blanket.

A frankfurt waiting to be rolled into its pastry blanket.


I buy the puff pastry in frozen sheets because I’m not much of a cook, and I’ve never managed to make my own puff pastry successfully. It is also much easier and quicker to buy frozen puff pastry. I let it defrost for a few minutes before cutting each piece in half across, and then in thirds or quarters lengthways, making six or eight rectangles of pastry out of each square pastry sheet. When the pastry sheets are cut into eighths, each frankfurt has a little less pastry on it, so there is a little bit of red poking out the ends of the pastry blanket.

Ready for the oven.

Ready for the oven.

L helping me to roll the pigs.

L helping me to roll the pigs.


Onto each piece of pastry, I  placed one cocktail frankfurt and rolled them up, just like in a blanket. I pinched the edge of the pastry down, and then popped them on a tray in the oven to cook until they were puffy and golden.

Cooling down before eating.

Cooling down before eating.

Ready to eat!

Ready to eat!


These go down very well with the kids!

Fruit Kebabs

Standard

With all the lovely summer fruits out at the moment, we have been eating a lot of fruit salad. The kids would probably live on fruit if they could. Instead of just cutting up the fruit and mixing it together before adding it to bowls for everyone, today we decided to make some fruit kebabs.

IMG_7575

It was pretty simple. I washed the fruit and cut it into chunks and put them on a tray. We had watermelon, pineapple, two types of grapes and strawberries. I left the grapes whole. Any fruit firm enough to be threaded onto skewers would have worked, but these are the fruits we are enjoying at the moment.

Threading a strawberry carefully onto her skewer.

Threading a strawberry carefully onto her skewer.

Adding a grape.

Adding a grape.


I discovered I only had jumbo skewers, rather than the standard sized ones in the drawer, so our kebabs were a bit bigger than normal. The kids also made some mini-kebabs with toothpicks, which really only fitted a couple of pieces of fruit. Soaking the skewers in water for half an hour or so can reduce the incidence of little splinters from the skewers coming off on the fruit, but I didn’t do that today as the kids were too impatient to wait. Luckily for us, no splinters!

I let the kids make their own kebabs by threading on whatever pieces of fruit they wanted. A found this quite easy, but L often threaded her pieces of fruit too close to the edge, and some of them broke and fell off. They made a couple of kebabs each, and then there was all the fun of eating them!

Finished fruit kebabs.

Finished fruit kebabs.

Some mini-kebabs.

Some mini-kebabs.